Advantech TREK-550-HA0E Manuals
Manuals and User Guides for Advantech TREK-550-HA0E. We have 2 Advantech TREK-550-HA0E manuals available for free PDF download: User Manual

Advantech TREK-550-HA0E User Manual (62 pages)
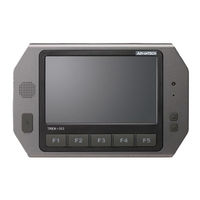
In-Vehicle Computing Box Smart Display
Table of Contents
-
Introduction11
-
Dimensions15
-
-
-
Fuse27
-
-
-
Jumpers31
-
Connectors32
-
-
-
-
-
Introduction43
-
CAN Test45
-
RTC Test47
-
Advantech TREK-550-HA0E User Manual (53 pages)
In-Vehicle Computing Box Smart Display
Table of Contents
-
-
-
-
-
-
Motherboard27
-
Jumpers28
-
Connectors29
-
-
-
-
-
-
Introduction39
-
CAN Test40
-
RTC Test41
-
GPIO Test45
-
G- Sensor47
-