beautypg.com
Manuals
Brands
Allied Telesis Manuals
Wireless Access Point
AT-TQ2403
Allied Telesis AT-TQ2403 Manuals
Manuals and User Guides for Allied Telesis AT-TQ2403. We have
2
Allied Telesis AT-TQ2403 manuals available for free PDF download: User Manual, Installation Manual
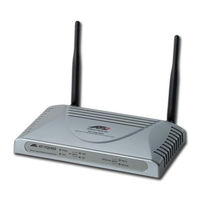
Allied Telesis AT-TQ2403 User Manual (292 pages)
Management Software
Brand:
Allied Telesis
| Category:
Wireless Access Point
| Size: 3.71 MB
Table of Contents
Table of Contents
6
Preface
15
Purpose of this Guide
15
How this Guide Is Organized
15
Document Conventions
15
Contacting Allied Telesis
16
Online Support
16
Email and Telephone Support
16
Warranty
16
Where to Find Web-Based Guides
16
Returning Products
16
Sales or Corporate Information
16
Management Software Updates
16
Tell Us What You Think
16
Chapter 1: Preparing to Set up the AT-TQ2403 Wireless Access Point
17
Setting up the Administrator's Computer
17
Setting up the Wireless Client Computers
18
Understanding Dynamic and Static IP Addressing on the AT-TQ2403 Management Software
19
How Does the Access Point Obtain an IP Address at Start-Up
19
Dynamic IP Addressing
19
Static IP Addressing
19
Recovering an IP Address
20
Chapter 2: Setting up the AT-TQ2403 Management Software
21
Running Kick Start to Find Access Points on the Network
21
Figure 1: Kick Start Welcome Dialog Box
22
Figure 2: Kick Start Search Results Dialog Box
22
Logging in to the AT-TQ2403 Management Software
23
Figure 3: Administration Dialog Box
23
Figure 4: Log-In Dialog Box
24
Figure 5: Basic Settings Page
24
Configuring the Basic Settings and Starting the Wireless Network
25
Configuring the Basic Settings
25
Chapter 3: Configuring Basic Settings
27
Navigating to Basic Settings
27
Figure 6: Basic Settings Page
27
Review / Describe the Access Point
28
Figure 7: Basic Settings Page Step 1
28
Provide Network Settings
29
Figure 8: Basic Settings Step 2
29
Update Basic Settings
30
Basic Settings for a Standalone Access Point
30
Setting User Interface Scheme Preferences
30
Navigation
30
Figure 9: Basic Settings Page Step 3
30
Figure 10: Web User Interface Setting
30
Chapter 4: Managing Access Points and Clusters
31
Navigating to Access Points Management
32
Understanding Clustering
32
What Is a Cluster
32
How Many Aps Can a Cluster Support
32
Only the same Country Domain Setting Can be Clustered
32
Figure 11: Access Points Setting Page
32
What Kinds of Aps Can Cluster Together
33
Which Settings Are Shared as Part of the Cluster Configuration and Which Are Not
33
Cluster Formation
34
Cluster Size and Membership
34
Intra-Cluster Security
35
Understanding Access Point Settings
35
Figure 12: Access Points Setting Page
35
Modifying the Location Description
36
Setting the Cluster Name
36
Stopping Clustering
37
Starting Clustering
37
Navigating to Configuration Information for a Specific AP and Managing Standalone Aps
37
Navigating to an AP by Using Its IP Address in a URL
38
Chapter 5: Managing User Accounts
39
Navigating to User Management for Clustered Access Points
39
Viewing User Accounts
40
Adding a User
40
Figure 13: User Management Page
40
Editing a User Account
41
Enabling and Disabling User Accounts
41
Enabling a User Account
41
Figure 14: Cluster Settings Page Detail
41
Disabling a User Account
42
Removing a User Account
42
Backing up and Restoring a User Database
42
Backing up the User Database
42
Restoring a User Database from a Backup File
42
Chapter 6: Session Monitoring
43
Navigating to Session Monitoring
43
Understanding Session Monitoring Information
43
Figure 15: Sessions Setting Page
43
Sorting Session Information
45
Refreshing Session Information
45
Chapter 7: Channel Management
46
Navigating to Channel Management
46
Figure 16: Channel Management Setting Page
46
Understanding Channel Management
47
How It Works in a Nutshell
47
For the Curious: more about Overlapping Channels
47
Example: a Network before and after Channel Management
47
Figure 17: before Channel Management Enable
47
Configuring and Viewing Channel Management Settings
48
Stopping/Starting Automatic Channel Assignment
48
Figure 18: after Channel Management Enable
48
Viewing Current Channel Assignments and Setting Locks
49
Update Current Channel Settings (Manual Setting)
49
Figure 19: after Channel Management Enable
49
Viewing Last Proposed Set of Changes
50
Configuring Advanced Settings (Customizing and Scheduling Channel Plans)
50
Update Advanced Settings
51
Chapter 8: Wireless Neighborhood
52
Navigating to Wireless Neighborhood
52
Figure 20: Wireless Neighborhood Page
52
Understanding Wireless Neighborhood Information
53
Viewing Wireless Neighborhood
53
Viewing Details for a Cluster Member
55
Figure 21: Cluster Member Setting Detail
55
Chapter 9: Configuring Security
57
Understanding Security Issues on Wireless Networks
57
How Do I Know Which Security Mode to Use
57
Comparison of Security Modes for Key Management, Authentication and Encryption Algorithms
58
Does Prohibiting the Broadcast SSID Enhance Security
62
Navigating to Security Settings
62
Configuring Security Settings
62
Figure 22: Security Setting Page
62
Broadcast SSID, Station Isolation, and Security Mode
63
Figure 23: Security Setting Page - None (Plain-Text) Setting
64
None (Plain-Text)
64
Figure 24: Security Setting Page - Static WEP Setting
65
Static WEP
65
Figure 25: Security Setting Page - Static WEP Setting Example
68
Figure 26: Providing a Wireless Client with a WEP Key
68
Figure 27: Example of Using Multiple WEP Keys and Transfer Key Index on Client Stations
69
IEEE 802.1X
69
Figure 28: Security Setting Page - Ieee802.1X Setting Page
70
WPA Personal
71
Figure 29: Security Setting Page - WPA Personal Setting Page
72
WPA Enterprise
73
Figure 30: Security Setting Page - WPA Enterprise Setting Page
74
Updating Settings
77
Chapter 10: Maintenance and Monitoring
78
Interfaces
78
Figure 31: Status - Interfaces Page
78
Ethernet (Wired) Settings
79
Wireless Settings
79
Event Logs
79
Figure 32: Status - Event Page
79
Enabling or Disabling Persistence
80
Severity
80
Figure 33: Persistence Setting Detail
80
Depth
81
Log Relay Host for Kernel Messages
81
Understanding Remote Logging
81
Setting up the Log Relay Host
82
Enabling or Disabling the Log Relay Host on the Status > Events Page
82
Update Settings
82
Figure 34: Relay Log Host Setting Detail
82
Events Log
83
Transmit/Receive Statistics
83
Figure 35: Transmit / Receive Page
83
Associated Wireless Clients
84
Figure 36: Client Associations Page
84
Link Integrity Monitoring
85
Neighboring Access Points
85
Figure 37: Neighboring Access Points Page
85
Chapter 11: Setting the Ethernet (Wired) Interface
88
Navigating to Ethernet (Wired) Settings
88
Setting the DNS Hostname
89
Figure 38: Ethernet (Wired) Settings Page
89
Enabling or Disabling Guest Access
90
Configuring an Internal LAN and a Guest Network
90
Enabling or Disabling Guest Access and Choosing a Virtual Network
90
Enabling or Disabling Virtual Wireless Networks on the AP
90
Enabling or Disabling Standby Power Saving
91
Configuring LAN or Internal Interface Ethernet Settings
91
Configuring Guest Interface Ethernet (Wired) Settings
94
Updating Settings
94
Chapter 12: Setting the Wireless Interface
95
Navigating to Wireless Settings
95
Figure 39: Wireless Settings Page
95
Configuring 802.11D Regulatory Domain Support
96
802.11H Regulatory Domain Control
96
Configuring the Radio Interface
97
Configuring "Internal" LAN Wireless Settings
98
Configuring "Guest" Network Wireless Settings
99
Updating Settings
99
Chapter 13: Setting up Guest Access
100
Understanding the Guest Interface
100
Configuring the Guest Interface
101
Configuring a Guest Network on a Virtual LAN
101
Configuring the Welcome Screen (Captive Portal)
101
Using the Guest Network as a Client
102
Deployment Example
102
Figure 40: Guest Login Setting Page
102
Figure 41: Guest Network Diagram Example
103
Chapter 14: Configuring Virtual Wireless Networks
104
Navigating to Virtual Wireless Network Settings
104
Figure 42: VWN Page
104
Configuring Vlans
105
Updating Settings
106
Chapter 15: Configuring Radio Settings
107
Understanding Radio Settings
107
Navigating to Radio Settings
107
Figure 43: Radio Setting Page
108
Updating Settings
113
Chapter 16: Controlling Access by MAC Address Filtering
114
Navigating to MAC Filtering Settings
114
Using MAC Filtering
114
Figure 44: MAC Filtering Setting Page
114
Updating Settings
115
Chapter 17: Load Balancing
116
Understanding Load Balancing
116
Identifying the Imbalance: Overworked or Under-Utilized Access Points
116
Specifying Limits for Utilization and Client Associations
116
Load Balancing and Qos
117
Navigating to Load Balancing Settings
117
Configuring Load Balancing
117
Figure 45: Load Balancing Settings Page
117
Updating Settings
118
Chapter 18: Pre-Config Rogue AP
119
Navigating to Pre-Config Rogue AP Settings
119
Figure 46: Pre-Config Rogue AP Page
119
Using Pre-Config Rogue AP
120
Updating Settings
120
Chapter 19: Configuring Quality of Service (Qos)
121
Understanding Qos
121
Qos and Load Balancing
121
802.11E and WMM Standards Support
122
Qos Queues and Parameters to Coordinate Traffic Flow
122
Figure 47: Backoff Timer Diagram
124
802.1Q and DSCP Tags
125
Figure 48: 802.1Q Tag Retrieving Flow Diagram
125
Navigating to Qos Settings
126
Configuring Qos Queues
126
Figure 49: Qos Setting Page
126
Configuring AP EDCA Parameters
127
Configuring Station EDCA Parameters
129
Enabling/Disabling Wi-Fi Multimedia
129
Updating Settings
131
Chapter 20: Configuring the Wireless Distribution System (WDS)
132
Understanding the Wireless Distribution System
132
Using WDS to Bridge Distant Wired Lans
132
Using WDS to Extend the Network Beyond the Wired Coverage Area
133
Security Considerations Related to WDS Links
133
Understanding Static (WEP) Data Encryption
133
Figure 50: Bridge Distant Wired LAN by WDS Diagram
133
Understanding WPA (PSK) Data Encryption
134
Navigating to WDS Settings
134
Figure 51: WDS Setting Page
134
Configuring WDS Settings
135
Updating Settings
137
Chapter 21: Configuring Simple Network Management Protocol (SNMP) on the AP
138
Understanding SNMP
138
Supported Mibs
139
Figure 52: SNMP Setting Diagram
139
Navigating to SNMP Settings
140
Configuring SNMP Settings
140
Figure 53: SNMP Setting Page
140
Configuring SNMP Traps
142
Updating SNMP Settings
143
Chapter 22: Enabling the Network Time Protocol Server
144
Navigating to Time Protocol Settings
144
Figure 54: Time Setting Page
144
Enabling or Disabling a Network Time Protocol (NTP) Server
145
Updating Settings
145
Chapter 23: Backing up and Restoring a Configuration
146
Navigating to the Access Point's Configuration Settings
146
Figure 55: Configuration Page
146
Resetting Factory Default Configuration
147
Saving the Current Configuration to a Backup File
147
Figure 56: Configuration Setting Detail
147
Restoring the Configuration from a Previously Saved File
148
Rebooting the Access Point
148
Upgrading the Firmware
149
Figure 57: Configuration Setting Page
149
Figure 58: Upgrade Page
150
Update
150
Verifying the Firmware Upgrade
150
Appendix A: Security Settings on Wireless Clients and RADIUS Server Setup
151
Network Infrastructure and Choosing between Built-In or External Authentication Server
152
Make Sure the Wireless Client Software Is Up-To-Date
152
Accessing the Microsoft Windows Wireless Client Security Settings
153
Figure 59: Wireless Network Connection Page
153
Configuring a Client to Access an Unsecure Network (no Security)
154
Figure 60: Wireless Network Connection Properties Page
154
Configuring Static WEP Security on a Client
155
Figure 61: Wireless Network Connection Properties Setting - no Security Setting Association Tab
155
Figure 62: Security Setting Page - Static WEP Setting Page
156
Figure 63: Client Side Security Setting - Static WEP Setting Detail Association Tab
156
Configuring IEEE 802.1X Security on a Client
157
IEEE 802.1X Client Using EAP/PEAP
158
Figure 64: Security Setting Page - Ieee802.1X Setting Page
158
Figure 65: Client Side Security Setting - Ieee802.1X Security Setting Detail
159
IEEE 802.1X Client Using EAP/TLS Certificate
161
Figure 66: Security Setting Page - Ieee802.1X Setting Page
162
Figure 67: Client Side Security Setting - Ieee802.1X Security Setting Detail
163
Configuring WPA/WPA2 Enterprise (RADIUS) Security on a Client
165
Figure 68: Security Setting Page - WPA Enterprise Setting Page
166
Figure 69: User Management Page
166
Figure 70: Client Side Security Setting - WPA Enterprise Setting Detail
167
WPA/WPA2 Enterprise (RADIUS) Client Using EAP-TLS Certificate
169
Figure 71: Security Setting Page - WPA Enterprise Setting Page
170
Figure 72: Client Side Security Setting - WPA Setting Detail
171
WPA/WPA2 Enterprise (RADIUS) Client Using EAP-SIM Certificate
172
Figure 73: Security Setting Page - WPA Enterprise Setting Page
173
Figure 74: Client Side Security Setting - WPA Setting Detail
174
Configuring WPA/WPA2 Personal (PSK) Security on a Client
175
Figure 75: Security Setting Page - WPA Personal Setting Page
175
Figure 76: Client Side Security Setting - WPA Personal Setting Detail
175
Figure 77: Radius Server - Internet Authentication Service
178
Figure 78: Radius Server Setting - Input New Radius Client
178
Figure 79: Radius Server Setting - New Radius Client Setting
179
Figure 80: Radius Server
179
Obtaining a TLS-EAP Certificate for a Client
180
Figure 81: Web Security Alert
180
Figure 82: Welcome Message from Certification Server
181
Figure 83: Radius Server Log-In Page
181
Figure 84: User Certification Installation - Request a Certification
181
Figure 85: User Certification Installation - Identifying Information
182
Figure 86: User Certification Installation - Submit
182
Configuring RADIUS Server for VLAN Tags
183
Configuring a RADIUS Server
183
Figure 87: User Certification Installation - Certification Issued
183
Figure 88: User Certification Installation - Certification Installed
183
Appendix B: Troubleshooting
185
Wireless Distribution System (WDS) Problems and Solutions
185
Cluster Recovery
185
Reboot or Reset Access Point
185
Bootloader Recovery
186
Appendix C: Command Line Interface (CLI) for AP Configuration
187
Comparison of Settings Configurable with the CLI and Web UI
188
How to Access the CLI for an Access Point
190
Telnet Connection to the AP
190
SSH Connection to the AP
191
Figure 89: SSH Application Setting - Putty as an Eample
191
Quick View of Commands and How to Get Help
192
Commands and Syntax
192
Getting Help on Commands at the CLI
195
Ready to Get Started
197
Command Usage and Configuration Examples
197
Understanding Interfaces as Presented in the CLI
197
Understanding CLI Validation of Configuration Settings
198
Saving Configuration Changes
198
Basic Settings
199
Access Point and Cluster Settings
203
User Accounts
204
Status
206
Ethernet (Wired) Interface
216
Wireless Interface
220
Guest Access
220
Enable/Configure Guest Login Welcome Page
222
Configuring Virtual Wireless Networks (Vwns)
223
Example: Configuring Vwns
227
Security
228
Radio Settings
244
MAC Filtering
253
Load Balancing
255
Quality of Service
256
Wireless Distribution System (WDS)
262
Simple Network Management Protocol (SNMP)
264
Time Protocol
265
Pre-Config Rogue AP
266
Reboot the AP
266
Reset the AP to Factory Defaults
267
Upgrade the Firmware
267
Keyboard Shortcuts and Tab Completion Help
268
Keyboard Shortcuts
268
Tab Completion and Help
269
CLI Classes and Properties Reference
272
Figure 90: Kick Start Search Results Dialog Box
273
Glossary
274
Allied Telesis AT-TQ2403 Installation Manual (24 pages)
EEE 802.11abgh, Dual Radio, Enterprise Wireless Access Point
Brand:
Allied Telesis
| Category:
Wireless Access Point
| Size: 1.95 MB
Table of Contents
Table of Contents
6
Preface
8
Purpose of this Guide
8
How this Guide Is Organized
8
Document Conventions
8
Contacting Allied Telesis
9
Online Support
9
Email and Telephone Support
9
Warranty
9
Where to Find Web-Based Guides
9
Returning Products
9
Sales or Corporate Information
9
Management Software Updates
9
Tell Us What You Think
9
Chapter 1: Overview
10
Features
10
Front and Back Panels
10
Leds
11
Figure 1: Front and Back Panels
11
Chapter 2: Installation
12
Reviewing Safety Precautions
12
Installation Guidelines
12
Microwave Ovens
13
Cordless Telephones
13
Other Access Points
13
Unpacking the Access Point
14
Antennas Installation
14
Figure 2: Location of the Antenna Connectors
14
Using the Access Point on a Desktop
15
Mounting an Access Point on a Wall
15
Figure 3: Connecting Antennas
15
Figure 4: Attaching the Rubber Feet
15
Mounting the Access Point on a Metal Surface
16
Figure 5: Aligning the Access Point for Mounting on the Wall
16
Figure 6: Attaching the Magnets
16
Connecting the Access Point to the LAN
17
Powering on the Access Point
17
Figure 7: Attaching the LAN Cable
17
Figure 8: Connecting the Power Adapter
17
Running Kickstart to Find Access Points on the Network
18
Figure 9: Poe Connection
18
Figure 10: Kickstart Welcome Page
19
Figure 11: Kickstart Search Results Page
19
Figure 12: Administration Dialog Box
20
Figure 13: Login Dialog Box
20
Warranty Registration
21
Figure 14: Basic Settings Page
21
Chapter 3: Troubleshooting
22
Resetting Factory Default Configuration
22
Appendix A: Technical Specifications
23
Physical Specifications
23
Environmental Specifications
23
Power Specifications
23
Safety and Electromagnetic Emissions Certifications
23
Appendix B: Radio Bands
24
Related Products
Allied Telesis AT-TQ2450
Allied Telesis AT-TQ3600
Allied Telesis AT-TQ4400e
Allied Telesis AT-TQ5403 Series
Allied Telesis AT-TQ4600-OF13
Allied Telesis AT-TQm5403
Allied Telesis AT-TQ3600-01
Allied Telesis AT-TQm6602 GEN2
Allied Telesis AT-TQ6602 GEN2
Allied Telesis AT-TQ6702 GEN2-R
Allied Telesis Categories
Switch
Network Router
Media Converter
Network Hardware
Wireless Access Point
More Allied Telesis Manuals