beautypg.com
Manuals
Brands
Barco Manuals
Projector
HDX--W14
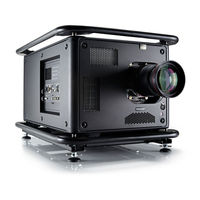
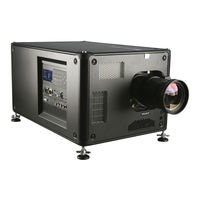
Barco HDX--W14 Manuals
Manuals and User Guides for Barco HDX--W14. We have
4
Barco HDX--W14 manuals available for free PDF download: Installation Manual, User And Installation Manual, Technical Specifications
Barco HDX--W14 User And Installation Manual (340 pages)
HDX series
Brand:
Barco
| Category:
Projector
| Size: 45.18 MB
Table of Contents
Table of Contents
5
1 Safety
11
General Considerations
11
General Safety Instructions
11
Notice on Safety
11
Important Safety Instructions
12
Important Warnings Concerning HDX Flight Cases
14
2 General
17
Installation Requirements
17
Projector Weight
18
Unpacking the Projector
18
Initial Inspection
19
Box Content
19
HDX Flight Case
20
Projector Configurations
20
Rear Projection
21
Positioning the Projector
22
Projector Air Inlets and Outlets
24
Free Download of Projector Toolset
24
Installation Process Overview
25
Quick Setup
25
3 Physical Installation
27
Remote Control Unit (RCU)
27
RCU Battery Installation
27
RCU Rugged Case Installation
28
RCU XLR Adaptor Installation
29
Using the XLR Adaptor of the RCU
29
RCU Usage Possibilities
30
Lenses
31
Available Lenses
31
Lens Selection
32
Lens Installation
33
Lens Removal
34
Lens Safety Cable
35
Lens Shift, Zoom & Focus
37
Scheimpflug Adjustment
38
How to Adjust
39
Connecting the Projector with the Power Net
42
Alignment of a Table Mounted Projector
43
Mounting the Bottom Carry Handler
43
Mounting the Top Carry Handler
45
Suspension of the Projector with Rigging Clamps
46
Alignment of a Ceiling Mounted Projector
48
4 Input & Communication
51
Introduction
51
Input Source Connections
52
Communication Connections
54
Usb Port
56
Ethernet Port
56
Status Lights
56
Utility-Accessory Outlet
57
5 Getting Started
59
RCU & Local Keypad
59
Terminology Overview
59
Power on Projector
61
Software Overview
63
Switching to Standby
64
Power off Projector
64
Status Leds
65
Using the RCU
65
Projector Address
67
Displaying and Programming Addresses into the RCU
67
Controlling the Projector
67
Common Address
67
Source Selection
67
6 Quick Set up Adjustment
69
Text Boxes on or off
69
Quick Lens Adjustment Via LENS Key
69
Direct Lens Adjustment (RCU)
71
Quick Picture in Picture
72
Quick Language Selection
72
7 Start up of the Adjustment Mode
75
About the Adjustment Mode
75
About the Use of the Remote Control and the Local Keypad
75
Start up the Adjustment Mode
75
Navigation and Adjustments
76
Menu Memory
77
Shortcut Keys to the Menus
77
Test Patterns in Adjustment Mode
78
Help Information in Adjustment Mode
78
8 Input
79
Input Menu Overview
79
Input Selection
80
Advanced Settings
81
About Input Setup
81
Input Configuration
81
DVI - RGB Input
82
SDI Input
83
Cable Input
84
HDMI - Displayport Input (3D Input Module)
84
Input Locking
85
Minimum Delay
86
Native Resolution
87
No Signal
88
Background Color
88
Background Logo
89
Shutdown Settings
90
Shutdown Retarding Time
90
Auto Dimming
91
Edid
92
Configure an Input
92
Create Custom EDID File
94
Delete a Custom EDID File
95
Delete All Custom EDID File
96
Input
97
About 3D Modes
97
Supported Formats
99
Activate 3D
100
Auto Detection
101
Input Type Selection
102
Second Input
103
L-R Synchronisation, Field Dominance
104
L-R Synchronisation, Invert 3D Sync out
105
9 Image
109
Image Menu Overview
109
Start up the Image Adjustments
110
Image Settings
110
Contrast
110
Brightness
111
Saturation
112
Phase
113
Color Temperature (Fixed Values)
115
Color Temperature (Custom Values)
116
Input Balance
117
Introduction to Input Balance
117
Adjusting the Input Balance
118
Image Settings, Defaults
121
Aspect Ratio
122
Timings
124
Source Timings
124
Advanced Timings, Clamp Delay - Clamp Width
125
Image File Services
127
Connecting a New Source
127
Files and File Manipulations
127
Manual Load File
127
File Load Filter
128
The Image Is Not Perfect
128
Delete a File
129
Delete All Custom Files
130
Rename Custom Files
131
Copy Custom File
132
Image File Service Options, Auto Picture Alignment
134
Image File Service Options, Load File
134
Save Custom Settings
135
What Can be Done
135
Splash Image
136
10 Layout
139
Layout Menu Overview
139
Introduction
139
Main Window
140
Main Window Source Selection
140
Main Window Size
140
Main Window Position
142
Pip Window
143
Introduction to PIP
144
Picture in Picture Activation
144
Pip Window, Source Selection
145
Pip Window, Size
146
Pip Window, Position
147
Layout File Services
149
Load Layout File
149
Rename Layout File
150
Delete Layout File
151
Delete All Layout Files
152
Copy or Save as Layout File
153
Lens Behavior
154
11 Lamp
157
Lamp Menu Overview
157
Lamp Power Mode
157
Hush Kit Activate/Deactivate
158
Lamp Power
159
Auto Dimming When on Pause
160
Auto Dimming When no Signal
161
Auto Dimming When Over-Temperature
162
CLO Mode (Constant Light Output Mode)
163
CLO Targets
165
LPS Power
165
How to Display
166
Lamp Identification
166
Z-Axis Adjustment
167
12 Alignment
169
Alignment Menu Overview
169
Orientation
170
Lens Adjustment, Zoom - Focus
171
Lens Adjustment, Shift
172
Lens Adjustment, MID Position
173
Calbrate Lens at Startup
174
Calibrate Lens
174
Warping
175
About Warping
176
Warp Activation - Deactivation
176
Start up Manual Adjustment
177
Warp Adjustment Principle
178
Setting the Warping Level
181
Warp Adaptation Steps
181
Making Selections and Adjustments
182
Keystone Correction Workflow
183
Linearity Adjustment, Workflow
184
Selecting and Changing the Position of a SpecifiC Point
185
Scaling the Image
185
Shifting the Image
186
Rotating the Image
186
Hardware Reset
188
OSD Opacity
188
Warp File Service, Load File
190
Warp File Service, Save to File
191
Warp File Service, Save as
191
Warp File Service, Rename File
192
Warp File Service, Delete File
193
Warp File Service, Delete All Files
194
Warp Board Reset
195
Warp Board and Values Reset
196
Alternative Side Keystone
197
Blanking Adjustment
198
Contrast-Intensity
200
Gamma
201
Internal Patterns
201
Color Space
203
What Can be Adjusted
203
Scenergix
205
Introduction
205
Preparations
206
Scenergix Activation
206
Scenergix Pattern
206
Scenergix Adjustment Lines
207
Data Doubling
208
White Level Adjustment (Blending Area)
210
Black Level Adjustment
213
Scenergix Reset
216
Glasses
217
Dark Time Adjustment
217
Left-Right Output Reference Delay
220
Sync Loop through
221
13 Projector Control
223
Projector Control Menu Overview
223
Individual Projector Address
224
Projector Common Address
225
Serial Communication
226
Baud Rate Setup
226
Interface Standard
226
Network
227
Introduction to a Network Connection
227
Wired DHCP Set up
228
Wired IP Address Set up
229
Wired Subnet Mask Set up
230
Wired Default Gateway Set up
232
Wireless Network Activation
233
Wireless Access Points Selection and Setup
234
Wireless DHCP Set up
236
Wireless Fixed IP Address Set up
237
Wireless Subnet Mask Set up
238
Wireless Default Gateway Set up
240
IR Control Switching
241
DMX
242
DMX Address
242
What Should be Done
242
DMX Universe
244
DMX Mode
245
Art-Net DMX
246
Front XLR Output Voltage Control
247
Monitor
249
DMX Shutdown
250
DMX Shutdown Retarding Time
251
Buttons
252
Standby Button
252
Shortcut Keys
253
Menu Position
254
Local LCD
254
Language Selection
255
Scheduler
256
How to Change the Language
256
Add a Task to the List
257
Lamp Status
259
Edit a Task
260
Delete Task
261
Scheduler, on or off
262
GSM Configuration, Activation
263
GSM Configuration, Subscription
265
FLEX, Light Output Configuration
267
About FLEX, Light Output Control
267
Light Output Configuration Via OSD Menu
268
Configure Projector's Light Output Via SMS
269
SMS Services
269
Request for Notifications
269
Request for Information
270
Lamp Ignition Admission
270
14 Service
271
Service Menu Overview
271
Identification
272
What Can be Seen
272
Diagnosis
273
Versions
273
Measurements
274
Logging
276
Board ID
278
Notification
279
Tilt Sensor
280
Internal Service Patterns
281
Convergence
285
Factory Defaults
286
USB Memory
287
Reset Formatter
289
Refill Mode
289
Save Custom Settings
290
Special HD Camera Mode
291
Auto Dimming When Over-Temperature
292
Time and Date
293
15 Maintenance
295
Cleaning the Lens
295
Cleaning the Exterior of the Projector
295
16 Servicing
297
Inserting an Input Module
297
Removal of the Lamp House
298
Installation of the Lamp House
299
Removal of the
300
Mounting the
302
Removal of the Lamp Cover
303
Mounting the Lamp Cover
304
Replacement of the High Density Dust Filter
305
Remove and Clear Metal Front Filter
306
How to Install
307
Dimensions
309
Dimensions of a HDX Projector
309
Specifications
311
Specifications of the HDX W12
311
Specifications of the HDX W14
312
Specifications of the HDX W18
313
Specifications of the HDX W20 FLEX
314
Barco HDX--W14 User And Installation Manual (331 pages)
Brand:
Barco
| Category:
Projector
| Size: 44.65 MB
Table of Contents
Table of Contents
5
1 Safety
11
General Considerations
11
Important Safety Instructions
12
Light Beam Hazard Distance (HD)
14
HD in Function of the Lens Throw Ratio (TR)
15
Important Warnings Concerning HDX Flight Cases
16
2 General
17
Installation Requirements
17
Environment Conditions
17
Unpacking the Projector
18
Initial Inspection
19
Box Content
19
HDX Flight Case
20
Projector Configurations
20
Rear Projection
21
Positioning the Projector
22
Projector Air Inlets and Outlets
24
Free Download of Projector Toolset
24
Installation Process Overview
25
3 Physical Installation
27
Remote Control Unit (RCU)
27
RCU Battery Installation
27
RCU Rugged Case Installation
28
RCU XLR Adaptor Installation
29
Using the XLR Adaptor of the RCU
29
RCU Usage Possibilities
30
Lenses
31
Available Lenses
31
Lens Selection
32
Lens Installation
33
Lens Removal
34
Lens Safety Cable
35
Lens Shift, Zoom & Focus
37
Scheimpflug Adjustment
38
How to Adjust
39
Connecting the Projector with the Power Net
41
Alignment of a Table Mounted Projector
42
Mounting the Bottom Carry Handler
43
Mounting the Top Carry Handler
44
Suspension of the Projector with Rigging Clamps
45
Alignment of a Ceiling Mounted Projector
48
4 Input & Communication
51
Introduction
51
Input Source Connections
52
Communication Connections
54
Usb Port
56
Ethernet Port
56
Status Lights
56
Utility-Accessory Outlet
57
5 Getting Started
59
RCU & Local Keypad
59
Terminology Overview
59
Power on Projector
61
Software Overview
63
Switching to Standby
64
Power off Projector
64
Status Leds
65
Using the RCU
65
Projector Address
67
Displaying and Programming Addresses into the RCU
67
Controlling the Projector
67
Source Selection
67
6 Quick Set up Adjustment
69
Text Boxes on or off
69
Quick Lens Adjustment Via LENS Key
69
Direct Lens Adjustment (RCU)
71
Quick Picture in Picture
71
Quick Language Selection
72
7 Start up of the Adjustment Mode
75
About the Adjustment Mode
75
About the Use of the Remote Control and the Local Keypad
75
Start up the Adjustment Mode
75
Navigation and Adjustments
76
Menu Memory
77
Shortcut Keys to the Menus
77
Test Patterns in Adjustment Mode
78
Help Information in Adjustment Mode
78
8 Input
79
Input Menu Overview
79
Input Selection
80
Advanced Settings
81
About Input Setup
81
Input Configuration
81
DVI - RGB Input
82
SDI Input
82
Cable Input
84
HDMI - Displayport Input (3D Input Module)
84
Input Locking
84
Minimum Delay
86
Native Resolution
87
No Signal
88
Background Color
88
Background Logo
89
Shutdown Settings
89
Shutdown Retarding Time
90
Auto Dimming
91
Edid
92
Configure an Input
92
Create Custom EDID File
93
Delete a Custom EDID File
95
Delete All Custom EDID File
96
Input
96
About 3D Modes
96
Supported Formats
98
Activate 3D
99
Auto Detection
100
Input Type Selection
101
Second Input
102
L-R Synchronisation, Field Dominance
103
L-R Synchronisation, Invert 3D Sync out
104
9 Image
107
Image Menu Overview
107
Start up the Image Adjustments
108
Image Settings
108
Contrast
108
Brightness
109
Saturation
110
Phase
111
Color Temperature (Fixed Values)
113
Color Temperature (Custom Values)
114
Input Balance
115
Introduction to Input Balance
115
Adjusting the Input Balance
116
Image Settings, Defaults
119
Aspect Ratio
120
Timings
122
Source Timings
122
Advanced Timings, Clamp Delay - Clamp Width
123
Image File Services
125
Files and File Manipulations
125
Manual Load File
125
File Load Filter
126
Delete a File
126
Delete All Custom Files
128
Rename Custom Files
129
Copy Custom File
130
Image File Service Options, Load File
131
Image File Service Options, Auto Picture Alignment
132
Save Custom Settings
133
Splash Image
133
10 Layout
137
Layout Menu Overview
137
Introduction
137
Main Window
138
Main Window Source Selection
138
Main Window Size
139
Main Window Position
140
Pip Window
141
Introduction to PIP
142
Picture in Picture Activation
142
Pip Window, Source Selection
143
Pip Window, Size
144
Pip Window, Position
145
Layout File Services
147
Load Layout File
147
Rename Layout File
148
Delete Layout File
148
Delete All Layout Files
149
Copy or Save as Layout File
150
Lens Behavior
151
11 Lamp
153
Lamp Menu Overview
153
Lamp Power Mode
153
Lamp Power
154
Auto Dimming When on Pause
154
Auto Dimming When no Signal
154
Auto Dimming When Over-Temperature
155
CLO Mode (Constant Light Output Mode)
155
CLO Targets
157
LPS Power
157
Lamp Identification
157
Z-Axis Adjustment
158
12 Alignment
159
Alignment Menu Overview
159
Orientation
160
Lens Adjustment, Zoom - Focus
161
Lens Adjustment, Shift
162
Lens Adjustment, MID Position
163
Calbrate Lens at Startup
163
Calibrate Lens
164
Warping
165
About Warping
166
Warp Activation - Deactivation
166
Start up Manual Adjustment
167
Warp Adjustment Principle
168
Setting the Warping Level
171
Warp Adaptation Steps
171
Making Selections and Adjustments
172
Keystone Correction Workflow
173
Linearity Adjustment, Workflow
174
Selecting and Changing the Position of a SpecifiC Point
175
Scaling the Image
175
Shifting the Image
176
Rotating the Image
176
Hardware Reset
178
OSD Opacity
178
Warp File Service, Load File
179
Warp File Service, Save to File
180
Warp File Service, Save as
181
Warp File Service, Rename File
182
Warp File Service, Delete File
183
Warp File Service, Delete All Files
184
Warp Board Reset
185
Warp Board and Values Reset
186
Alternative Side Keystone
187
Blanking Adjustment
188
Contrast-Intensity
190
Gamma
191
Internal Patterns
191
Color Space
192
Scenergix
194
Introduction
194
Preparations
195
Scenergix Activation
195
Scenergix Pattern
196
Scenergix Adjustment Lines
197
Data Doubling
198
White Level Adjustment (Blending Area)
199
Black Level Adjustment
202
Scenergix Reset
205
Glasses
206
Dark Time Adjustment
206
Left-Right Output Reference Delay
209
Sync Loop through
210
Upper Limit for Triple or Double Flash
211
High End Systems Mirror
212
13 Projector Control
215
Projector Control Menu Overview
215
Individual Projector Address
216
Projector Common Address
217
Serial Communication
218
Baud Rate Setup
218
Interface Standard
218
Network
219
Introduction to a Network Connection
219
Wired DHCP Set up
220
Wired IP Address Set up
221
Wired Subnet Mask Set up
222
Wired Default Gateway Set up
224
Wireless Network Activation
225
Wireless Access Points Selection and Setup
226
Wireless DHCP Set up
228
Wireless Fixed IP Address Set up
229
Wireless Subnet Mask Set up
230
Wireless Default Gateway Set up
232
IR Control Switching
233
DMX
234
DMX Address
234
DMX Universe
236
DMX Mode
237
Art-Net DMX
238
Front XLR Output Voltage Control
239
Monitor
241
DMX Shutdown
242
DMX Shutdown Retarding Time
242
Buttons
243
Standby Button
243
Shortcut Keys
244
Menu Position
245
Local LCD
246
Language Selection
247
Scheduler
248
Add a Task to the List
248
Edit a Task
251
Delete Task
253
Scheduler, on or off
254
GSM Configuration, Activation
255
GSM Configuration, Subscription
257
FLEX, Light Output Configuration
259
About FLEX, Light Output Control
259
Light Output Configuration Via OSD Menu
260
Configure Projector's Light Output Via SMS
261
SMS Services
261
Request for Notifications
261
Request for Information
262
Lamp Ignition Admission
262
14 Service
263
Service Menu Overview
263
Identification
264
Diagnosis
265
Versions
265
Measurements
266
Logging
267
Board ID
269
Notification
269
Tilt Sensor
270
Internal Service Patterns
271
Convergence
275
Factory Defaults
277
USB Memory
278
Reset Formatter
279
Refill Mode
280
Save Custom Settings
281
Special HD Camera Mode
282
Auto Dimming When Over-Temperature
283
Time and Date
283
15 Maintenance
285
Cleaning the Lens
285
Cleaning the Exterior of the Projector
285
16 Servicing
287
Inserting an Input Module
287
Removal of the Lamp House
288
Installation of the Lamp House
289
Removal of the
290
Mounting the
292
Removal of the Lamp Cover
293
Mounting the Lamp Cover
294
Replacement of the High Density Dust Filter
295
Remove and Clear Metal Front Filter
296
How to Install
297
Dimensions
299
Dimensions of a HDX Projector
299
Specifications
301
Specifications of the HDX W12
301
B.1 Specifications of the HDX W12
301
Specifications of the HDX W14
302
Specifications of the HDX W18
303
Specifications of the HDX W20 FLEX
304
Technical Regulations
306
B.5 Technical Regulations
306
Barco HDX--W14 Installation Manual (351 pages)
HDX series
Brand:
Barco
| Category:
Projector
| Size: 50.94 MB
Table of Contents
Table of Contents
5
1 Safety
9
General Considerations
10
Important Safety Instructions
11
Important Warnings Concerning HDX Flight Cases
14
2 General
15
Installation Requirements
16
Unpacking the Projector
17
Initial Inspection
19
HDX Flight Case
20
Rear Projection
21
Projector Configurations
21
Positioning the Projector
23
Projector Air Inlets and Outlets
25
Free Download of Projector Toolset
26
Installation Process Overview
27
3 Physical Installation
29
Remote Control Unit (RCU)
30
RCU Battery Installation
31
RCU Rugged Case Installation
32
RCU XLR Adaptor Installation
33
Using the XLR Adaptor of the RCU
34
RCU Usage Possibilities
35
Lenses
36
Available Lenses
37
Lens Selection
39
Lens Installation
40
Lens Removal
42
Lens Shift, Zoom & Focus
43
Scheimpflug Adjustment
44
How to Adjust
45
Connecting the Projector with the Power Net
48
Alignment of a Table Mounted Projector
49
Mounting the Bottom Carry Handler
50
Mounting the Top Carry Handler
52
Suspension of the Projector with Rigging Clamps
53
Alignment of a Ceiling Mounted Projector
56
4 Input & Communication
57
Introduction
58
Input Source Connections
59
Communication Connections
61
Usb Port
63
Ethernet Port
63
Status Lights
63
Utility-Accessory Outlet
64
5 Getting Started
65
How Controlling the Projector
66
RCU & Local Keypad
66
Remote Control Functions
66
Terminology Overview
67
Power on Projector
69
Software Overview
70
Switching to Standby
72
Power off Projector
73
Status Leds
74
Using the RCU
75
Projector Address
76
Displaying and Programming Addresses into the RCU
77
Controlling the Projector
78
Source Selection
79
6 Quick Set up Adjustment
81
Text Boxes on or off
82
Quick Lens Adjustment Via LENS Key
83
Direct Lens Adjustment (RCU)
85
Quick Picture in Picture
86
Quick Language Selection
87
7 Start up of the Adjustment Mode
89
About the Adjustment Mode
90
About the Use of the Remote Control and the Local Keypad
91
Start up the Adjustment Mode
92
Navigation and Adjustments
93
Menu Memory
94
Shortcut Keys to the Menus
95
Test Patterns in Adjustment Mode
96
8 Input
97
Input Menu Overview
98
Slot Module Type
99
About Input Setup
100
Input Configuration
101
DVI - RGB Input
102
SDI Input
103
Cable Input
105
Input Locking
106
Native Resolution
108
No Signal
110
Background Color
111
Background Logo
112
Shutdown Settings
113
Shutdown Retarding Time
114
Auto Dimming
115
9 Image
117
Image Menu Overview
118
Start up the Image Adjustments
119
Image Settings
120
Contrast
121
Brightness
122
Saturation
123
Phase
124
Color Temperature (Fixed Values)
126
Color Temperature (Custom Values)
128
Input Balance
129
Introduction to Input Balance
130
Adjusting the Input Balance
132
Aspect Ratio
135
Timings
137
Source Timings
138
Advanced Timings, Clamp Delay - Clamp Width
139
Image File Services
141
Connecting a New Source
142
Files and File Manipulations
142
Manual Load File
143
File Load Filter
144
Delete a File
145
Delete All Custom Files
146
Rename Custom Files
147
Copy Custom File
149
Image File Service Options, Load File
151
Image File Service Options, Auto Picture Alignment
152
Save Custom Settings
153
10 Layout
155
Layout Menu Overview
156
Introduction
157
Main Window
158
Main Window Source Selection
159
Main Window Size
160
Main Window Position
162
Pip Window
164
Introduction to PIP
165
Picture in Picture Activation
166
Pip Window, Source Selection
167
Pip Window, Size
168
Pip Window, Position
170
Layout File Services
171
Load Layout File
172
Rename Layout File
173
Delete Layout File
174
Delete All Layout Files
175
Copy or Save as Layout File
176
Zoom - Focus - Shift Windows
177
11 Lamp
179
Lamp Menu Overview
180
Lamp Power Mode
181
Lamp Power
182
Auto Dimming When on Pause
183
CLO Mode (Constant Light Output Mode)
184
CLO Targets
186
How to Display
187
Lamp Identification
187
Z-Axis Adjustment
188
12 Alignment
189
Alignment Menu Overview
190
Orientation
191
Lens Adjustment, Zoom - Focus
192
Lens Adjustment, Shift
193
Lens Adjustment, MID Position
194
Home Lens at Startup
195
Calibrate Lens
196
Warping
197
About Warping
198
Warping Status
199
Rotation
200
Keystone
202
Pin-Barrel Correction
204
Corners Adjustment
206
Warp File Service
207
Blanking Adjustment
208
Contrast-Intensity
210
Gamma
211
Internal Patterns
212
Color Space
213
Scenergix
215
Introduction
216
Preparations
217
Scenergix Activation
218
Scenergix Pattern
219
Scenergix Adjustment Lines
220
White Level Adjustment (Blending Area)
221
Black Level Adjustment
224
13 Projector Control
229
Projector Control Menu Overview
230
Individual Projector Address
231
Projector Common Address
232
Serial Communication
233
Baud Rate Setup
234
Interface Standard
235
Network
236
Introduction to a Network Connection
237
Wired DHCP Set up
238
Wired IP Address Set up
239
Wired Subnet Mask Set up
241
Wired Default Gateway Set up
243
Wireless Network Activation
245
Wireless DHCP Set up
247
Wireless IP Address Set up
248
Wireless Subnet Mask Set up
250
IR Control Switching
252
DMX
253
DMX Address
254
DMX Universe
255
DMX Mode
256
Art Net DMX
257
Monitor
258
Buttons
259
Standby Button
260
Shortcut Keys
261
Menu Position
262
Local LCD
263
Language Selection
264
14 Service
265
Service Menu Overview
266
Identification
267
What Can be Seen
267
Diagnosis
269
Versions
270
Measurements
272
Logging
274
Board ID
276
Notification
277
Tilt Sensor
279
Internal Service Patterns
281
Convergence
284
Factory Defaults
286
USB Memory
287
Reset Formatter
289
Refill Mode
290
Save Custom Settings
291
Special HD Camera Mode
292
Auto Dimming When Over-Temperature
293
Time and Date
294
15 Maintenance
295
Cleaning the Lens
296
Cleaning the Exterior of the Projector
297
16 Servicing
299
Inserting an Input Module
300
Removal of the Lamp House
301
Installation of the Lamp House
303
Removal of the
304
Mounting the
306
Removal of the Lamp Cover
308
Mounting the Lamp Cover
309
Replacement of the High Density Dust Filter
310
Remove and Clear Metal Front Filter
311
Dimensions
313
Dimensions of a HDX Projector
314
Specifications
315
Specifications of the HDX W14
317
Specifications of the HDX W12
319
Standard Source Files
321
C.1 Table Overview
323
Barco HDX--W14 Technical Specifications (4 pages)
14,000 lumens, WUXGA, 3-chip DLP Projector
Brand:
Barco
| Category:
Projector
| Size: 6.86 MB
Related Products
Barco HDX series
Barco HDX W20
Barco HDX W18
Barco HDX W12
Barco HDX 4K12
Barco HDX 4K14
Barco HDX 4K20 FLEX
Barco HDX 4K
Barco HDF Series
Barco XLM HD30 R9004461
Barco Categories
Projector
Monitor
Projector Accessories
Medical Equipment
Controller
More Barco Manuals