beautypg.com
Manuals
Brands
Daikin Manuals
Chiller
SERHQ-BAW1
Daikin SERHQ-BAW1 Manuals
Manuals and User Guides for Daikin SERHQ-BAW1. We have
2
Daikin SERHQ-BAW1 manuals available for free PDF download: Installer And User Manual, Installation And Operation Manual
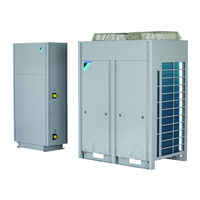
Daikin SERHQ-BAW1 Installer And User Manual (76 pages)
Split packaged air-cooled water chiller
Brand:
Daikin
| Category:
Chiller
| Size: 6.12 MB
Table of Contents
Table of Contents
2
General Safety Precautions
3
About the Documentation
3
Meaning of Warnings and Symbols
3
For the User
4
For the Installer
4
General
4
Installation Site
4
Refrigerant
5
Brine
5
Water
6
About the Documentation
6
About this Document
6
Installer and User Reference Guide at a Glance
7
For the Installer
7
About the Box
7
Overview: about the Box
7
Outdoor Unit
7
To Unpack the Outdoor Unit
7
To Handle the Outdoor Unit
8
Indoor Unit
8
To Unpack the Indoor Unit
8
About the Units and Options
9
Overview: about the Units and Options
9
Identification Label: Outdoor Unit
9
Identification Label: Indoor Unit
9
About the Outdoor Unit
9
About the Indoor Unit
10
About Combining Units and Options
10
Operation Range
10
Combining Units and Options
10
Possible Options for the Split System
10
System Layout
10
Preparation
10
Overview: Preparation
10
Preparing the Installation Site
11
Installation Site Requirements of the Outdoor Unit
11
Installation Site Requirements of the Indoor Unit
12
Preparing Refrigerant Piping
12
Refrigerant Piping Requirements
12
To Select the Piping Size
12
About the Piping Length
13
Preparing Water Piping
13
Water Circuit Requirements
13
Formula to Calculate the Expansion Vessel Pre-Pressure
14
To Check the Water Volume and Expansion Vessel Pre-Pressure
14
Changing the Pre-Pressure of the Expansion Vessel
15
To Check the Water Volume: Examples
15
Preparing Electrical Wiring
15
About Preparing Electrical Wiring
15
About Electrical Compliance
16
Cable Requirements
16
Safety Device Requirements
16
Overview: Installation
16
Opening the Units
17
About Opening the Units
17
To Open the Outdoor Unit
17
To Open the Indoor Unit
17
To Open the Electrical Component Box of the Outdoor Unit
17
To Open the Electrical Component Box of the Indoor Unit
18
Mounting the Outdoor Unit
18
About Mounting the Outdoor Unit
18
Precautions When Mounting the Outdoor Unit
18
To Provide the Installation Structure
18
To Provide Drainage
18
Mounting the Indoor Unit
18
About Mounting the Indoor Unit
18
Precautions When Mounting the Indoor Unit
19
To Provide the Installation Structure
19
Connecting the Refrigerant Piping
19
Precautions When Connecting the Refrigerant Piping
19
To Braze the Pipe End
20
Using the Stop Valve and Service Port
20
To Connect the Refrigerant Piping to the Outdoor Unit
21
To Connect the Refrigerant Piping to the Indoor Unit
22
Checking the Refrigerant Piping
23
About Checking the Refrigerant Piping
23
Precautions When Checking the Refrigerant Piping
23
Checking Refrigerant Piping: Setup
23
To Check for Leaks: Pressure Leak Test
23
To Perform Vacuum Drying
23
To Insulate the Refrigerant Piping
24
Charging Refrigerant
24
About Charging Refrigerant
24
Precautions When Charging Refrigerant
24
To Determine the Additional Refrigerant Amount
25
To Charge Refrigerant
25
Error Codes When Charging Refrigerant
27
Final Adjustment of the Refrigerant Amount
27
To Input the Additional Refrigerant Charge Weight
28
Checks after Charging Refrigerant
28
To Fix the Fluorinated Greenhouse Gases Label
28
Connecting the Water Piping
29
About Connecting the Water Piping
29
Precautions When Connecting the Water Piping
29
To Connect the Water Piping
29
To Fill the Water Circuit
29
To Insulate the Water Piping
29
Connecting the Electrical Wiring
29
About Connecting the Electrical Wiring
29
Precautions When Connecting Electrical Wiring
30
Field Wiring: Overview
31
About the Electrical Wiring
31
To Route and Fix the Power Supply
31
To Connect the Power Supply of the Outdoor Unit
32
To Connect the Power Supply and Transmission Cables
33
Guidelines When Knocking out Knockout Holes
33
To Install the User Interface
34
To Install Optional Equipment
34
Configuration
35
Overview: Configuration
35
Making Field Settings
35
About Making Field Settings
35
Field Setting Components
35
To Access the Field Setting Components
35
To Access Mode 1 or 2
36
To Use Mode 1
36
To Use Mode 2
36
Mode 1: Monitoring Settings
36
Mode 2: Field Settings
37
Field Settings on the User Interface
38
Using the Leak Detection Function
42
About Automatic Leak Detection
42
To Manually Perform a Leak Detection
42
Switching between Cooling and Heating
43
Commissioning
43
Overview: Commissioning
43
Precautions When Commissioning
43
Checklist before Commissioning the Outdoor Unit
44
Checklist before Commissioning the Indoor Unit
44
Final Check
45
To Perform a Test Run of the Outdoor Unit
45
Refrigerant Added Using Automatic Charging
45
Refrigerant Added Using Manual Charging (Cooling Mode)
45
Refrigerant Added Using Manual Charging (Heating Mode, Pre-Charging)
46
Correcting after Abnormal Completion of the Test Run
46
Checklist Handover to the User
46
To Complete the Model Fill-In
47
Maintenance and Service
47
Overview: Maintenance and Service
47
Maintenance Safety Precautions
47
To Prevent Electrical Hazards
47
About Service Mode Operation
47
To Use Vacuum Mode
47
To Recover Refrigerant
47
Checklist for Yearly Maintenance of the Indoor Unit
48
10 Troubleshooting
48
Overview: Troubleshooting
48
Error Codes: Overview
48
Error Codes of the Outdoor Unit
49
11 Disposal
49
12 Technical Data
50
Overview: Technical Data
50
Service Space: Outdoor Unit
50
Service Space: Indoor Unit
50
Piping Diagram: Outdoor Unit
52
Piping Diagram: Indoor Unit
53
Wiring Diagram: Outdoor Unit
54
Wiring Diagram: Indoor Unit
55
Technical Specifications: Outdoor Unit
56
Field Settings on the User Interface - Overview
57
12.10 Field Settings on the Outdoor Unit
59
12.11 ESP Curve: Indoor Unit
60
For the User
60
13 About the System
60
System Layout
60
14 User Interface
61
Before Operation
61
16 Operation
62
Operation Range
62
Quick Start-Up
62
Operating the System
63
About the Clock
63
About Operating the System
64
Space Cooling Operation
64
Space Heating Operation
64
Other Operation Modes
65
Schedule Timer
65
Operating the Optional Demand PCB
69
Operating the Optional External Control Adapter
69
Operating the Optional Remote Controller
69
17 Maintenance and Service
69
About the Refrigerant
70
After-Sales Service and Warranty
70
Warranty Period
70
Recommended Maintenance and Inspection
70
Recommended Maintenance and Inspection Cycles
70
18 Troubleshooting
70
Error Codes: Overview
71
Daikin SERHQ-BAW1 Installation And Operation Manual (52 pages)
Split packaged air-cooled water chiller
Brand:
Daikin
| Category:
Chiller
| Size: 4.99 MB
Table of Contents
Table of Contents
5
About the Documentation
6
About this Document
6
For the Installer
6
About the Box
6
Outdoor Unit
6
To Remove the Accessories from the Outdoor Unit
6
Indoor Unit
6
To Remove the Accessories from the Indoor Unit
6
About the Units and Options
7
Identification
7
About the Outdoor Unit
7
About the Indoor Unit
7
Operation Range
7
System Layout
7
Preparation
7
Preparing the Installation Site
7
Installation Site Requirements of the Outdoor Unit
7
Installation Site Requirements of the Indoor Unit
8
Preparing Refrigerant Piping
8
Refrigerant Piping Requirements
8
To Select the Piping Size
8
About the Piping Length
8
Preparing Water Piping
8
To Check the Water Volume and Expansion Vessel Pre-Pressure
8
Preparing Electrical Wiring
9
Safety Device Requirements
9
Installation
10
Opening the Units
10
About Opening the Units
10
To Open the Outdoor Unit
10
To Open the Indoor Unit
10
To Open the Electrical Component Box of the Outdoor Unit
10
To Open the Electrical Component Box of the Indoor Unit
11
Mounting the Outdoor Unit
11
To Provide the Installation Structure
11
To Provide Drainage
11
Mounting the Indoor Unit
11
Connecting the Refrigerant Piping
12
Using the Stop Valve and Service Port
12
To Connect the Refrigerant Piping to the Outdoor Unit
13
To Connect the Refrigerant Piping to the Indoor Unit
14
Checking the Refrigerant Piping
15
Checking Refrigerant Piping: Setup
15
To Check for Leaks: Pressure Leak Test
15
To Perform Vacuum Drying
15
To Insulate the Refrigerant Piping
15
Charging Refrigerant
16
About Charging Refrigerant
16
Precautions When Charging Refrigerant
16
To Determine the Additional Refrigerant Amount
16
To Charge Refrigerant
16
Checks after Charging Refrigerant
17
To Fix the Fluorinated Greenhouse Gases Label
17
Connecting the Water Piping
17
To Connect the Water Piping
17
To Fill the Water Circuit
17
To Insulate the Water Piping
18
Connecting the Electrical Wiring
18
Field Wiring: Overview
18
To Route and Fix the Power Supply
18
To Connect the Power Supply of the Outdoor Unit
19
To Connect the Power Supply and Transmission Cables
20
Guidelines When Knocking out Knockout Holes
20
To Install the User Interface
21
To Install Optional Equipment
21
Configuration
21
Making Field Settings
21
About Making Field Settings
21
Field Setting Components
22
To Access the Field Setting Components
22
To Access Mode 1 or 2
22
To Use Mode 1
23
To Use Mode 2
23
Mode 1: Monitoring Settings
23
Mode 2: Field Settings
24
Field Settings on the User Interface
25
Switching between Cooling and Heating
29
Commissioning
30
Precautions When Commissioning
30
Checklist before Commissioning the Outdoor Unit
30
Checklist before Commissioning the Indoor Unit
31
Final Check
32
About the Test Run
32
To Display the Temperature on the Remote Controller
32
To Test Space Heating/Cooling
32
Correcting after Abnormal Completion of the Test Run
32
Troubleshooting
33
Error Codes: Overview
33
Technical Data
34
Service Space: Outdoor Unit
34
Service Space: Indoor Unit
34
Piping Diagram: Outdoor Unit
35
Piping Diagram: Indoor Unit
36
Wiring Diagram: Outdoor Unit
37
Wiring Diagram: Indoor Unit
37
For the User
38
10 About the System
38
System Layout
38
User Interface
38
Operation
39
Operation Range
39
Quick Start-Up
39
Operating the System
40
About the Clock
40
About Operating the System
41
Space Cooling Operation
41
Space Heating Operation
41
Other Operation Modes
42
Schedule Timer
42
Operating the Optional Demand PCB
46
Operating the Optional External Control Adapter
46
Operating the Optional Remote Controller
46
13 Maintenance and Service
46
About the Refrigerant
47
After-Sales Service and Warranty
47
Warranty Period
47
Recommended Maintenance and Inspection
47
Related Products
Daikin SERHQ020BAW1
Daikin SERHQ032BAW1
Daikin SEHVX20BAW
Daikin SEHVX64BAW
Daikin SEHVX32BAW
Daikin SEHVX40BAW
Daikin SC087
Daikin SC079
Daikin SkyAir RZF-A Series
Daikin SEHVX-BAW
Daikin Categories
Air Conditioner
Heat Pump
Remote Control
Chiller
Fan
More Daikin Manuals