beautypg.com
Manuals
Brands
HP Manuals
Laptop
1115
HP 1115 Manuals
Manuals and User Guides for HP 1115. We have
4
HP 1115 manuals available for free PDF download: Service Manual, User Manual, Startup Manual
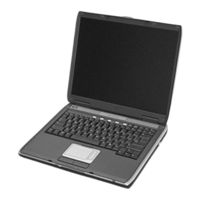
HP 1115 Service Manual (188 pages)
Notebook PC
Brand:
HP
| Category:
Laptop
| Size: 11.78 MB
Table of Contents
Table of Contents
3
Table 1-1. Notebook Products
7
Table 1-2. Product Comparisons
49
Features
54
Figure 1-1. Front View
54
Figure 1-2. Back View
55
Figure 1-3. Bottom View
56
Figure 1-4. Front View
57
Figure 1-5. Back View
58
Figure 1-6. Bottom View
59
Operation
60
Table 1-3. Activating Power Modes
60
Table 1-4. Main Status Lights (Front of Notebook)
61
Table 1-5. Keyboard Status Lights
61
Table 1-6. Fn Hot Keys
62
Figure 1-7. Resetting the Notebook
63
Specifications
64
Table 1-7. Specifications
64
Table 1-8. Accessories
68
Figure 1-8. Replaceable Module Diagram
70
Internal Design
70
Table 1-9. Functional Structure Description
71
Removal and Replacement
72
Table 2-1. Removal Cross-Reference
72
Table 2-2. Required Equipment
73
Table 2-3. Recommended Screw Torque Values
73
Disassembly Flowchart
74
Figure 2-1. Disassembly Flow
74
Figure 2-2. Removing the Battery
75
Removing the Battery
75
Figure 2-3. Removing an SDRAM Module
76
Removing a SDRAM Module
76
Figure 2-4. Removing an SDRAM Module
77
Figure 2-5. Removing the Mini-PCI Card
78
Removing the Wireless LAN Mini-PCI Card
78
Figure 2-6. Removing the Mini-PCI Card
79
Figure 2-7. Removing the Hard Disk Drive
80
Removing the Hard Disk Drive
80
Figure 2-8. Removing the Hard Disk Drive Tray
81
Replacing Small Parts
82
Table 2-4. Replacing Small Parts
82
Removing the Keyboard Cover
83
Figure 2-9. Removing the Keyboard Cover
84
Figure 2-10. Disconnecting the Speaker Cable
85
Figure 2-11. Removing the Speaker Assembly
86
Removing the Speaker Assembly
86
Removing the Keyboard
87
Figure 2-12. Removing the Keyboard
88
Figure 2-13. Removing the Switchboard PCA
89
Figure 2-14. Removing the Switchboard PCA
90
Removing the Switchboard PCA
90
Removing the CD/DVD Drive
91
Figure 2-15. Removing the CD/DVD Drive
92
Figure 2-16. Removing the CD/DVD Drive
93
Removing the Display Assembly
94
Figure 2-17. Removing the Display Assembly
95
Removing the Top Case
97
Figure 2-18. Removing the Top Case
98
Figure 2-19. Removing the Top Case Screws
100
Figure 2-20. Removing the Top Case Screws
101
Figure 2-21. Removing the Top Case
102
Removing the Floppy Drive
103
Figure 2-22. Removing the Floppy Drive
104
Figure 2-23. Removing the Floppy Drive
106
Removing the Infrared (I/R) PCA
107
Figure 2-24. Removing the I/R PCA
108
Removing the Audio PCA
109
Figure 2-25. Removing the Audio PCA
110
Figure 2-26. Removing the Heat Sink (with Fan)
111
Removing the Heat Sink (with Fan)
111
Figure 2-27. Removing the Heat Sink (with Fan)
113
Removing the CPU Module
115
Figure 2-28. Removing the CPU Module
116
Figure 2-29. Removing the CPU Module
118
Removing the RJ11/1394 Connector Module
119
Figure 2-30. Removing the RJ11/1394 Connector Module
120
Removing the Motherboard
121
Figure 2-31. Removing the Motherboard
122
Removal Procedure
123
Figure 2-32. Removing the Hard Disk Drive Guide
124
Figure 2-33. Disconnecting the Motherboard Cables
125
Figure 2-34. Removing the Motherboard
127
Figure 2-35. Example of Serial Number Label
130
Replacing Components on a Bottom Case
130
Figure 2-36. Replacing the Antennas
131
Figure 2-37. Removing a PCMCIA Door
131
Repairing the BIOS IC
132
Figure 2-38. Boot-Block Jumper
133
Removing Other Components
134
Table 2-5. Removing Components
134
Troubleshooting and Diagnostics
136
Support by Authorized Service Providers
136
Table 3-1. ASP Support Options
136
Troubleshooting
137
Figure 3-1. Basic Troubleshooting Steps
137
Checking for Customer Abuse
138
Troubleshooting the Problem
138
Verifying the Repair
139
Table 3-2. Scope of Diagnostic Tools
140
Table 3-3. Troubleshooting Suggestions
141
Diagnostic Tools
153
Table 3-4. POST Terminal-Error Beep Codes
155
Table 3-5. POST Messages
158
Table 3-6. Sycard Pcctest Commands
160
Bios Setup Utility
161
Table 3-7. BIOS Setup Menus and Parameters
162
Replaceable Parts
164
Figure 4-1. Exploded View
165
Figure 4-2. Exploded View
166
Table 4-1. Replaceable Parts
167
Table 4-1. Replaceable Parts
168
Table 4-2. Accessory Replaceable Parts
175
Table 4-3. Part Number Reference
176
Reference Information
185
Password Removal Policy
185
Hewlett-Packard Display Quality Statement
186
Table 5-1. LCD Guidelines
187
Service Notes and Obsolete Parts
188
HP 1115 User Manual (83 pages)
HP Mini 1000: User Guide
Brand:
HP
| Category:
Laptop
| Size: 2.99 MB
Table of Contents
Table of Contents
5
1 Knowing the Parts
9
Identifying the Hardware
9
Top Components
9
Touchpad
9
Light
10
Keys
11
Front Components
11
Right-Side Components
13
Left-Side Components
13
Display Components
14
Bottom Components
15
Wireless Antennas
16
Additional Hardware Components
17
Identifying the Labels
17
2 Power Management
19
Setting Power Options
19
Using Power-Saving States
19
Initiating and Exiting Standby
19
Initiating and Exiting Hibernation
20
Using Power Schemes
20
Viewing the Current Scheme
20
Customizing Power Schemes
21
Selecting a Different Power Scheme
21
Setting Password Protection Upon Exiting Standby
21
Using External AC Power
21
Connecting the AC Adapter
22
Using Battery Power
22
Displaying the Remaining Battery Charge
23
Inserting or Removing the Battery
23
Charging a Battery
24
Maximizing Battery Discharge Time
25
Managing Low Battery Levels
25
Identifying Low Battery Levels
25
Resolving a Low Battery Level
27
Resolving a Low Battery Level When a Charged Battery Is Available
27
Resolving a Low Battery Level When External Power Is Available
27
Resolving a Low Battery Level When no Power Source Is Available
27
Resolving a Low Battery Level When the Device Cannot Exit Hibernation
27
Calibrating a Battery
27
Step 1: Fully Charge the Battery
27
Step 2: Disable Hibernation and Standby
28
Step 3: Discharge the Battery
28
Step 4: Fully Recharge the Battery
29
Step 5: Reenable Hibernation and Standby
29
Conserving Battery Power
29
Storing a Battery
29
Disposing of a Used Battery
30
Shutting down the Device
30
3 Internet
31
Connecting to a Wired Network
32
Connecting to a Wireless Network
33
Using Wireless Devices
33
Identifying Wireless and Network Status Icons
33
Using HP Connection Manager Software (Select Models Only)
34
Using the Wireless Controls
34
Using the Wireless Switch
34
Using HP Wireless Assistant Software
35
Using a WLAN
35
Protecting Your WLAN
36
Setting up a WLAN
36
Connecting to a WLAN
37
Roaming to Another Network
38
Using HP Mobile Broadband (Select Models Only)
39
Inserting a SIM
39
Removing a SIM
40
Using the HP Mobile Broadband Setup Utility (Select Models Only)
42
4 Multimedia
43
Multimedia Features
43
Identifying Your Multimedia Components
43
Adjusting the Volume
45
Multimedia Software
46
Using Other Preinstalled Multimedia Software
46
Installing Multimedia Software from the Internet
46
Audio
47
Connecting External Audio Devices
47
Checking Your Audio Functions
47
Video
49
Connecting an External Monitor or Projector
49
Webcam
50
5 Security
51
Protecting the Device
51
Security Protecting the Device
51
Using Passwords
51
Passwords Set in Windows
52
Passwords Set in Setup Utility
52
Administrator Password
53
Entering an Administrator Password
53
Managing an Administrator Password
53
Power-On Password
53
Entering a Power-On Password
54
Managing a Power-On Password
54
Using Antivirus Software
55
Using Firewall Software
56
Installing Critical Updates
57
6 Digital Cards
58
Inserting a Digital Card
58
Stopping and Removing a Digital Card
59
7 USB Devices
60
Using a USB Device
60
Connecting a USB Device
60
Stopping and Removing a USB Device
61
8 Pointing Devices and Keyboard
62
Setting Pointing Device Preferences
62
Using Pointing Devices
62
Using the Touchpad
62
Connecting an External Mouse
62
Using the Keyboard
62
Using Hotkeys
62
Initiating Standby (Fn+F1)
63
Decreasing Screen Brightness (Fn+F3)
64
Increasing Screen Brightness (Fn+F4)
64
Initiating Quicklock (Fn+F6)
64
Switching the Screen Image (Fn+F2)
64
Decreasing Speaker Sound (Fn+F10)
65
Increasing Speaker Sound (Fn+F11)
65
Muting Speaker Sound (Fn+F8)
65
9 Drives
66
Identifying Installed Drives
66
Handling Drives
66
Using External Drives
67
Using Optional External Devices
67
10 Memory Modules
68
11 Updating Software
72
Updating the BIOS
73
Determining the BIOS Version
73
Downloading a BIOS Update
73
Updating Programs and Drivers
75
12 Setup Utility
76
Starting the Setup Utility
76
Using the Setup Utility
76
Changing the Language of the Setup Utility
76
Navigating and Selecting in the Setup Utility
76
Displaying System Information
77
Restoring Default Settings in the Setup Utility
77
Exiting the Setup Utility
77
Setup Utility Menus
78
Main Menu
78
Security Menu
78
System Configuration Menu
78
Diagnostics Menu
79
Index
80
HP 1115 Service Manual (100 pages)
Notebook PC
Brand:
HP
| Category:
Laptop
| Size: 2.88 MB
Table of Contents
Table of Contents
3
Product Information
7
Table 1-1. Notebook Products
7
Table 1-2. Product Comparisons
8
Features
9
Figure 1-1. Front View
9
Figure 1-2. Back View
10
Figure 1-3. Bottom View
11
Operation
12
Turning the Notebook on and off
12
Table 1-3. Activating Power Modes
12
Checking the Status of the Notebook
13
Table 1-4. Main Status Lights (Front of Notebook)
13
Table 1-5. Keyboard Status Lights
13
Using Fn Hot Keys
14
Table 1-6. Fn Hot Keys
14
Resetting the Notebook
15
Figure 1-4. Resetting the Notebook
15
Specifications
16
Table 1-7. Specifications
16
Table 1-8. Accessories
19
Figure 1-5. Replaceable Module Diagram
20
Internal Design
20
Table 1-9. Functional Structure Description
21
Removal and Replacement
22
Table 2-1. Removal Cross-Reference
22
Table 2-2. Required Equipment
23
Table 2-3. Recommended Screw Torque Values
23
Disassembly Flowchart
24
Figure 2-1. Disassembly Flow
24
Figure 2-2. Removing the Battery
25
Removing the Battery (User-Replaceable)
25
Figure 2-3. Removing an SDRAM Module
26
Removing a SDRAM Module (User-Replaceable)
26
Figure 2-4. Removing the Mini-PCI Card
27
Removing the Wireless LAN Mini-PCI Card (User-Replaceable)
27
Figure 2-5. Removing the Hard Disk Drive
28
Removing the Hard Disk Drive (User-Replaceable)
28
Figure 2-6. Removing the Hard Disk Drive Tray
29
Replacing Small Parts (User-Replaceable)
30
Table 2-4. Replacing Small Parts (User-Replaceable)
30
Removing the Keyboard Cover (User-Replaceable)
31
Figure 2-7. Removing the Keyboard Cover
32
Figure 2-8. Removing the Speaker Assembly
33
Removing the Speaker Assembly (User-Replaceable)
33
Removing the Keyboard (User-Replaceable)
34
Figure 2-9. Removing the Keyboard
35
Figure 2-10. Removing the Switchboard PCA
36
Removing the Switchboard PCA (User-Replaceable)
36
Figure 2-11. Removing the CD/DVD Drive
37
Removing the CD/DVD Drive (User-Replaceable)
37
Removing the Display Assembly (Authorized Service Providers Only)
38
Figure 2-12. Removing the Display Assembly
39
Removing the Top Case (Authorized Service Providers Only)
41
Figure 2-13. Removing the Top Case
42
Removing the Floppy Drive (Authorized Service Providers Only)
43
Figure 2-14. Removing the Floppy Drive
44
Removing the Infrared (I/R) PCA (Authorized Service Providers Only)
46
Figure 2-15. Removing the I/R PCA
47
Figure 2-16. Removing the Heatsink (with Fan)
48
Removing the Heatsink (with Fan) (Authorized Service Providers Only)
48
Removing the CPU Module (Authorized Service Providers Only)
50
Figure 2-17. Removing the CPU Module
51
Removing the Motherboard (Authorized Service Providers Only)
52
Figure 2-18. Removing the Motherboard
53
Figure 2-19. Example of Serial Number Label
56
Replacing Components on a Bottom Case
56
Figure 2-20. Replacing the Antennas
57
Figure 2-21. Removing a PCMCIA Door
57
Repairing the BIOS IC (Authorized Service Providers Only)
58
Figure 2-22. Boot-Block Jumper
59
Removing Other Components (Authorized Service Providers Only)
60
Table 2-5. Removing Components
60
Troubleshooting and Diagnostics
62
Support by Authorized Service Providers
62
Table 3-1. ASP Support Options
62
Troubleshooting
63
Figure 3-1. Basic Troubleshooting Steps
63
Checking for Customer Abuse
64
Troubleshooting the Problem
64
Verifying the Repair
65
Suggestions for Troubleshooting
66
Table 3-2. Scope of Diagnostic Tools
66
Table 3-3. Troubleshooting Suggestions
67
Diagnostic Tools
78
E-Diagtools Diagnostic Program
78
Power-On Self-Test
79
Table 3-4. POST Terminal-Error Beep Codes
80
Table 3-5. POST Messages
83
Sycard Pcctest 450/460 PC Card (Optional)
85
Table 3-6. Sycard Pcctest Commands
85
Windows Management Instrumentation (WMI)
86
BIOS Setup Utility
86
Table 3-7. BIOS Setup Menus and Parameters
87
Replaceable Parts
89
Figure 4-1. Exploded View
90
Table 4-1. Replaceable Parts
91
Table 4-2. Accessory Replaceable Parts
93
Table 4-3. Part Number Reference
93
Reference Information
96
Password Removal Policy
96
Hewlett-Packard Display Quality Statement
97
Table 5-1. LCD Guidelines
98
Service Notes and Obsolete Parts
99
HP 1115 Startup Manual (75 pages)
HP Compaq Presario,Presario 1110: User Guide
Brand:
HP
| Category:
Laptop
| Size: 0.66 MB
Table of Contents
Important Safety Information
3
Table of Contents
7
Getting Started with Your Notebook
9
Taking Inventory
10
What's in the Box
10
To Find more Information
11
Identifying Parts of the Computer
12
Front View
12
Back View
13
Bottom View
14
Status Lights
15
Setting up Your Computer
17
Step 1: Install the Battery
17
Step 2: Connect AC Power
19
Step 3: Connect a Phone Line
20
Step 4: Turn on the Computer
21
Step 5: Set up Windows
21
To Connect to the Internet
22
What to Do Next
22
Basic Operation
23
Operating Your Computer
24
To Turn the Computer on and off
24
To Reset the Computer
25
To Change the Boot Device
26
To Use the Touch Pad
26
To Use the Fn Hot Keys
28
To Play DVD Movies
29
Batteries and Power Management
31
Using Battery Power
32
To Check Battery Status
32
To Respond to a Low-Battery Warning
33
To Recharge the Battery
33
Add-On Devices
35
Installing Additional RAM
36
To Install a RAM Expansion Module
36
Replacing the Hard Disk Drive
37
To Replace the Hard Disk Drive
37
Troubleshooting and Maintenance
39
Troubleshooting Your Computer
40
Display Problems
40
Hard Disk Drive Problems
41
Keyboard and Pointing Device Problems
41
Performance Problems
42
Power and Battery Problems
42
Startup Problems
43
Testing the Hardware
44
To Run the E-Diagtools Diagnostic Test
44
Configuring the Computer
46
To Run the BIOS Setup Utility
46
Reinstalling and Updating Software
47
To Recover the Factory Installation of Your Hard Disk
47
Support and Service
49
Getting Assistance for Your Computer
50
To Get Help from the Web
50
To Get Support or Service
50
To Receive Repair Service
52
To Prepare Your Computer for Shipment
53
Limited Warranty Statement
54
Reference Information
57
Hardware Specifications
58
Safety Information
61
Power Cords
61
Ergonomics
62
Battery Safety
62
Laser Safety
63
LED Safety
63
Mercury Safety
64
Exposure to Radio Frequency Radiation
64
Regulatory Information
65
U.s.a
65
Canada
67
European Union
68
Japan
69
New Zealand
70
Russia
71
International
71
Startup Guide
72
Index
73
Related Products
HP Compaq Presario,Presario 1110
HP 1115NR - Mini - Atom 1.6 GHz
HP 1116NR - MINI Netbook Notebok
HP 1150NR - Mini - Atom 1.6 GHz
HP 110-1125NR - Mini - Netbook
HP 110-1126NR - Mini - Netbook
HP Mini 110c-1000 - PC
HP Chromebook 11-2100
HP Chromebook 11 G8 Education Edition
HP Chromebook 11MK G9 EE
HP Categories
Desktop
Laptop
Server
Monitor
Switch
More HP Manuals