beautypg.com
Manuals
Brands
HP Manuals
Printer
LaserJet 4100
HP LaserJet 4100 Manuals
Manuals and User Guides for HP LaserJet 4100. We have
7
HP LaserJet 4100 manuals available for free PDF download: Reference Manual, Fax Manual, Upgrade And Replacement Instructions, Support Manual, Specification, User Manual
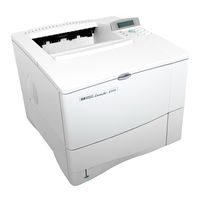
HP LaserJet 4100 Reference Manual (370 pages)
Printer Language Technical Reference Manual
Brand:
HP
| Category:
Printer Accessories
| Size: 3.11 MB
Table of Contents
Notice
4
Printing History
5
Trademark Credits
6
Inside this Manual
7
What You Can Learn from this Manual
7
Programming Hints
8
Job Control
8
Printer Reset
8
The HP-GL/2 Coordinate System
11
Related Documentation
12
PCL 5 Comparison Guide
12
Intellifont Scalable Typeface Format
12
Truetype Font Files
12
Table of Contents
13
Introduction to HP PCL
27
PCL Printer Language Architecture
28
What Are Printer Commands
29
Control Codes
29
PCL Commands
29
HP-GL/2 Commands
30
PJL Commands
30
Syntax of Escape Sequences
31
Two-Character Escape Sequences
31
Parameterized Escape Sequences
32
The Page
35
Logical Page
36
Printed Dots
37
PCL Coordinate System
38
Units of the PCL Coordinate System
39
PCL Units
39
Decipoints
39
Columns & Rows
39
Printer Internal Units
39
HP-GL/2 Picture Frame
40
Printable Area
41
The Print Environment
45
Factory Default Environment
46
Paper Source
47
Page Size
47
Line Joins
49
Fonts
50
User Default Environment
50
Modified Print Environment
51
Resetting the Print Environment
52
Printer Reset
52
Cold Reset
53
PCL Job Control Commands
55
Printer Reset Command
56
Universal Exit Language Command
57
Number of Copies Command
58
Simplex/Duplex Print Command
59
Left Offset Registration Command
61
Top Offset Registration Command
62
Duplex Page Side Selection Command
64
Job Separation Command
65
Output bin Selection Command
66
Unit of Measure Command
67
Page Control Commands
71
Page Size Command
72
Paper Source Command
74
HP-GL/2 & PCL Orientation Interactions
75
Logical Page Orientation Command
75
Scaling
76
Print Direction Command
79
Text Area
81
Left Margin Command
83
Right Margin Command
84
Clear Horizontal Margins Command
85
Top Margin Command
86
Text Length Command
88
Perforation Skip Command
89
Horizontal Motion Index (HMI) Command
90
Vertical Motion Index (VMI) Command
92
Common VMI Settings
93
Line Spacing Command
94
Cursor Positioning
95
Absolute Vs. Relative Cursor Positioning
96
Cursor Positioning Units
97
PCL Units
97
Decipoints
98
Columns & Rows
98
Horizontal Cursor Positioning (Columns) Command
99
Horizontal Cursor Positioning (Decipoints) Command
100
Horizontal Cursor Positioning (PCL Units) Command
101
Horizontal Cursor Positioning Control Codes
102
CR - Carriage Return
102
SP - Space
102
BS - Backspace
103
HT - Horizontal Tab
103
Vertical Cursor Positioning (Rows) Command
104
Vertical Cursor Positioning (Decipoints) Command
105
Vertical Cursor Positioning (PCL Units) Command
106
Half-Line Feed Command
107
Vertical Cursor Positioning Control Codes
107
LF - Line Feed
107
FF - Form Feed
107
Line Termination Command
108
Push/Pop Cursor Position Command
109
Fonts
111
Font Sources
112
Symbol Set
113
Spacing
114
Pitch
115
Height
115
Style
116
Stroke Weight
116
Typeface Family
117
Orientation
118
Example:
119
Bitmap Fonts and Scalable Typefaces
119
Internal Fonts
121
Special Effects
121
PCL Font Selection
123
Using Fonts
126
Primary and Secondary Fonts
127
Font Resolution
127
Symbol Set Command
128
Example
129
7-Bit ISO Symbol Sets
130
Spacing Command
131
Example
131
Pitch Command
132
Example
133
Height Command
134
Example
135
Style Command
136
Example
137
Stroke Weight Command
138
Example
139
Typeface Family Command
140
Example
141
Orientation
142
Font Selection Examples
143
Bitmap, Fixed-Spaced Font
143
Scalable, Proportional-Spaced Font
144
Summary of Font Selection by Characteristic
145
Font Selectionby ID Command
148
Examples
149
Select Default Font Command
149
HP-GL/2 Font Selection
149
Transparent Print Data Command
150
Example
150
Underline Command
151
Font Management
153
Downloading Soft Fonts
154
Temporary Vs. Permanent Fonts
155
Deleting Fonts
155
Font ID Command
156
Example
156
Font Control Command
157
Examples
157
Font Management Example
159
Unbound Scalable Fonts
160
Bound and Unbound Fonts
160
Font Selection and Unbound Fonts
160
User-Defined Symbol Sets
167
Symbol Set ID Code Command
168
Define Symbol Set
170
Header Size (UI)
171
Encoded Symbol Set Designator (UI)
172
Format (UB)
172
Symbol Set Type (UB)
172
First Code (UI)
173
Last Code (UI)
173
Character Requirements (Array of UB) and Character Requirement
173
Symbol Map (Array of UI)
177
Symbol Set Control Command
178
User-Defined Symbol Set Examples
179
Unicode Symbol Index Example
179
MSL Symbol Index Example
180
Soft Font Creation
183
Font Classifications
184
Coordinate System
186
Bitmap Fonts
186
Intellifont Scalable Fonts
186
Truetype Scalable Fonts
187
Font Header Command
188
Font Header Format
188
Data Types
196
Font Descriptor Size (UI)
197
Header Format (UB)
197
Font Type (UB)
197
Style MSB (UI)
198
Baseline Position (UI)
200
Cell Width (UI)
200
Cell Height (UI)
200
Orientation (UB)
201
Spacing (B)
202
Symbol Set (UI)
202
Pitch (UI)
203
Height (UI)
204
Xheight (UI)
204
Width Type (SB)
205
Style LSB (UB)
205
Stroke Weight (SB)
205
Typeface (UB)
206
Serif Style (UB)
209
Quality (UB)
210
Placement (SB)
210
Underline Position (Distance) (SB)
211
Underline Thickness (UB)
211
Text Height (UI)
211
Text Width (UI)
211
First Code (UI)
212
Last Code / Number of Characters (UI)
212
Pitch Extended (UB)
212
Height Extended (UB)
213
Cap Height (UI)
213
Font Number (ULI)
214
Font Name (ASC16)
215
Resolution (UI)
215
Y Resolution (UI)
216
Scale Factor (UI)
216
Master Underline Position (SI)
216
Master Underline Thickness (Height) (UI)
216
Font Scaling Technology (UB)
216
Variety (UB)
217
OR Threshold (UI)
217
Global Italic Angle (SI)
217
Global Intellifont Data Size (UI)
217
Global Intellifont Data
217
Character Complement (Array of UB)
217
Checksum
221
Copyright
221
Segmented Font Data (Format 15)
221
Font Header Examples
225
Character Definitions
230
Character Code Command
231
Character Definition Command
232
Character Descriptor Formats
233
Character Descriptor and Data Format for PCL Bitmap Fonts
233
Character Descriptor and Data Format for Intellifont Scalable Fonts
242
Character Descriptor and Data Format for Truetype Fonts
247
Character Definition Examples
252
Macro Creation
259
Macro Invocation
260
Temporary / Permanent Macros
261
Deleting Macros
262
Macro ID
262
Example
262
Macro Control
263
Enter HP-GL/2 Mode
263
Example
264
Macro Control Example
265
The PCL Print Model
267
PCL Raster Graphics
267
Command Sequence
271
Source Transparency Mode Command
272
Pattern Transparency Mode Command
273
Pattern ID (Area Fill ID) Command
274
Select Current Pattern Command
278
User-Defined Pattern Graphics
279
User-Defined Pattern Implementation
279
User-Defined Pattern Command
282
Format (Byte 0)
283
Continuation (Byte 1)
283
Pixel Encoding (Byte 2)
283
Reserved (Byte 3)
284
Height in Pixels (Bytes 4 and 5)
284
Width in Pixels (Bytes 6 and 7)
284
Pattern Image
284
Master X Resolution (UI)
284
Master y Resolution (UI)
284
User-Defined Pattern Example
285
Set Pattern Reference Point Command
288
Pattern Control Command
289
PCL Rectangular Area Fill Graphics
291
Rectangular Area Fill Procedure
291
Horizontal Rectangle Size (Decipoints) Command
293
Horizontal Rectangle Size (PCL Units) Command
293
Vertical Rectangle Size (Decipoints) Command
294
Vertical Rectangle Size (PCL Units) Command
294
Pattern ID (Area Fill ID) Command
295
Fill Rectangular Area Command
299
Pattern Transparency for Rectangular Area Fill
301
Rectangular Area Fill Examples
303
Pre-Defined Pattern Examples
303
User-Defined Pattern Example
307
Raster Graphics
309
Raster Graphics Command Sequence
312
Raster Graphics Resolution Command
314
Raster Graphics Presentation Mode Command
316
Raster Height Command
319
Raster Width Command
321
Start Raster Graphics Command
322
Raster y Offset Command
323
Set Compression Method Command
324
Unencoded (Method 0)
324
Run-Length Encoding (Method 1)
324
Tagged Image File Format Encoding (Method 2)
325
Example:
327
Delta Row Compression (Method 3)
328
Example: Delta Row Compression
332
Adaptive Compression (Method 5)
333
Transfer Raster Data Command
337
End Raster Graphics Command
338
Raster Graphics Example
339
Status Readback
343
Macros
343
Memory Status Request
344
Entity Status
345
Status Response
347
Status Response Syntax
348
Set Status Readback Location Type Command
350
Set Status Readback Location Unit Command
351
Inquire Status Readback Entity Command
352
Entity Status Responses
353
Font Response
353
Font Extended Response
357
Macro Response
358
User-Defined Pattern Response
359
Symbol Set Response
360
Entity Error Codes
361
Free Space Command
363
Memory Status Response
364
Memory Error Response
365
Flush All Pages Command
366
Performance
366
Echo Command
367
Echo Response
368
Status Readback Programming Hints
369
Example
369
HP LaserJet 4100 Fax Manual (156 pages)
HP MFP Analog Fax Fax Machines-Accessory: Fax Guide
Brand:
HP
| Category:
Fax Machine
| Size: 2.44 MB
Table of Contents
English
5
Table of Contents
5
1 Setting up
7
Introduction
7
Parts Included with the Fax Accessory
8
Attaching the Fax Accessory to the Mfp
8
Connecting the Parallel Cable
10
Connecting the Fax Accessory to a Phone Line
11
Connecting the Power Cord
12
Automatic Startup Process
13
Control Panel Methods
14
Characteristics Common to both Control Panels
14
Keypad Method
15
Touch-Screen Method
16
Specifying the Fax Settings
17
To Set the Country/Region Setting
17
To Set the Time, Date, and Fax Header
18
Setting Rings-To-Answer
18
To Set the Number of Rings-To-Answer
18
2 Faxing
19
Sending Faxes
19
To Send a Fax to One Recipient
19
To Send a Fax to Multiple Recipients
20
To Send a Fax Using Speed Dial (Group Dial)
20
Receiving Faxes
22
Setting up Speed Dial (Group Dial) Numbers
22
To Add a Speed Dial (Group Dial) Number
22
To Delete a Speed Dial (Group Dial) Number
23
Changing the Default Resolution for Outgoing Faxes
23
To Change the Default Resolution
23
Changing the Input and Output Trays for Incoming Faxes
24
To Change the Input and Output Trays
24
Changing the Volume Setting
24
To Change the Volume Setting
24
Setting Dial-Tone Detection
25
To Set Dial-Tone Detection
25
Setting a Dialing Prefix
25
To Set a Dialing Prefix
25
Setting Tone or Pulse Dialing
26
To Set Tone or Pulse Dialing
26
Setting Redial Rules
26
To Set Redial Rules
26
Enabling Billing Codes
27
To Enable Billing Codes
27
Blocking Incoming Faxes
27
To Block Incoming Faxes
27
Generating Fax Reports
28
To Print the Fax Activity Log
28
To Print a Fax Call Report
28
To Print a First Page Report
29
To Print a Blocked Fax List Report
29
To Print a Billing Code Report
29
Clearing Stored Information
30
To Clear the Activity Log
30
To Cancel or Delete Faxes
30
3 Troubleshooting
31
Is Your Fax Set up Correctly
31
What Type of Phone Line Are You Using
32
Are You Using a Phone-Line Splitter
33
Are You Using a Surge-Protection Device
33
Are You Using a Phone Company Voice-Messaging Service or an Answering Machine
33
General Fax Problems
34
Receiving Fax Problems
35
Sending Fax Problems
37
LED Indications
38
Appendix A Specifications and Regulatory Information
41
Fax Accessory Product Specifications
41
Replacement Parts and Accessories
43
US Federal Communications Commission
44
FCC Part 15 Compliance Statement
44
FCC Part 68 Compliance Statement
44
Telephone Consumer Protection Act (US)
45
Canadian Department of Communications
46
IC CS-03 Requirements
46
Other Regulatory Information
47
Regulatory Information for EU Countries/Regions
47
Declaration of Conformity
48
Hewlett-Packard Limited Warranty Statement
49
Environmental Product Stewardship Program
50
Protecting the Environment
50
Français
55
1 Installation
57
Introduction
57
Pièces Incluses Avec L'accessoire Télécopieur
58
Connexion de L'accessoire Télécopieur Au Périphérique Mfp
58
Connexion du Câble Parallèle
60
Connexion de L'accessoire Télécopieur À Une Ligne Téléphonique
61
Connexion du Cordon D'alimentation
62
Processus de Démarrage Automatique
63
Méthodes du Panneau de Commande
64
Caractéristiques Communes Aux Deux Panneaux de Commande
64
Méthode Via Le Clavier
65
Méthode Via Écran Tactile
66
Spécification des Paramètres du Télécopieur
67
Pour Définir Le Paramètre de Pays/Région
67
Pour Définir L'heure, la Date Et L'en-Tête de Télécopie
68
Définition du Nombre de Sonneries Avant Réponse
68
Pour Définir Le Nombre de Sonneries Avant Réponse
68
2 Envoi de Télécopies
69
Pour Envoyer Une Télécopie À un Destinataire
69
Pour Envoyer Une Télécopie À Plusieurs Destinataires
70
Pour Envoyer Une Télécopie À L'aide de la Numérotation Rapide (Numérotation de Liste)
70
Réception de Télécopies
72
Configuration des Codes (Numérotations de Liste) de Numérotation Rapide
72
Pour Ajouter un Code (Numérotation de Liste) de Numérotation Rapide
72
Pour Supprimer un Code (Numérotation de Liste) de Numérotation Rapide
73
Modification de la Résolution Par Défaut des Télécopies Envoyées
73
Pour Modifier la Résolution Par Défaut
73
Modification des Bacs D'entrée Et de Sortie Pour Les Télécopies Entrantes
74
Pour Modifier Les Bacs D'entrée Et de Sortie
74
Modification du Réglage du Volume
74
Pour Modifier Le Réglage du Volume
74
Configuration de la Détection de Tonalité
75
Pour Configurer la Détection de Tonalité
75
Configuration D'un Préfixe de Numérotation
75
Pour Configurer un Préfixe de Numérotation
75
Configuration de la Numérotation Par Tonalité Ou À Impulsions
76
Pour Configurer la Numérotation Par Tonalité Ou À Impulsions
76
Configuration des Règles de Rappel
76
Pour Configurer Les Règles de Rappel
76
Activation des Codes de Facturation
77
Pour Activer Les Codes de Facturation
77
Blocage de Télécopies Entrantes
77
Pour Bloquer des Télécopies Entrantes
77
Génération de Rapports de Télécopie
78
Pour Imprimer Le Relevé D'activité de Télécopie
78
Pour Imprimer un Relevé D'appels de Télécopie
78
Pour Imprimer un Relevé de Première Page
79
Pour Imprimer la Liste des Télécopies Bloquées
79
Pour Imprimer un Relevé de Codes de Facturation
79
Effacement des Informations Stockées
80
Pour Effacer Le Relevé D'activité
80
Pour Annuler Ou Supprimer des Télécopies
80
3 Dépannage
81
Votre Télécopieur Est-Il Correctement Configuré
81
Quel Type de Ligne Téléphonique Utilisez-Vous
82
Utilisez-Vous un Séparateur de Ligne Téléphonique
82
Utilisez-Vous un Périphérique de Protection Contre Les Surtensions
82
Utilisez-Vous un Service de Messagerie Vocale D'une Compagnie
83
Problèmes Généraux de Télécopie
84
Problèmes de Réception de Télécopie
85
Problèmes D'envoi de Télécopies
87
Indication des Voyants
89
Annexe A Caractéristiques Et Informations Réglementaires
91
Caractéristiques de L'accessoire Télécopieur
91
Pièces de Rechange Et Accessoires
93
US Federal Communications Commission
94
Conformité À L'alinéa 15 des Règles FCC
94
Conformité À L'alinéa 68 des Règles FCC
94
Loi de Protection des Usagers du Téléphone (Etats-Unis)
95
Ministère des Communications du Canada
96
Exigences IC Cs
96
Autres Informations Réglementaires
97
Informations Réglementaires Pour Les Pays/Régions de L'union Européenne
97
Déclaration de Conformité
98
Déclaration de Garantie Limitée de Hewlett-Packard
99
Programme de Gestion Écologique des Produits
101
Protection de L'environnement
101
Español
105
1 Configuración
107
Presentación
107
Conexión del Accesorio de Fax al Mfp
108
Piezas Incluidas con el Accesorio de Fax
108
Conexión del Cable Paralelo
110
Conexión del Accesorio de Fax a una Línea Telefónica
111
Conexión del Cable de Alimentación
112
Proceso de Inicio Automático
113
Métodos del Panel de Control
114
Características Comunes a Ambos Paneles de Control
114
Método de Teclado Numérico
115
Método de Pantalla Táctil
116
Especificación de la Configuración del Fax
117
Establecer la Configuración del País/Región
117
Establecer la Fecha, la Hora y la Cabecera de Fax
118
Configuración del Número de Tonos de Respuesta
118
Establecer el Número de Tonos de Respuesta
118
2 Enviar y Recibir Faxes
119
Envío de Faxes
119
Enviar un Fax a un Destinatario
119
Enviar un Fax a Varios Destinatarios
120
Enviar un Fax Mediante el Marcado Rápido (Marcado de Grupo)
120
Configuración de Los Números de Marcado Rápido (Marcado de Grupo)
122
Añadir un Número de Marcado Rápido (Marcado de Grupo)
122
Eliminar un Número de Marcado Rápido (Marcado de Grupo)
124
Recepción de Faxes
122
Cambio de la Resolución Predeterminada de Los Faxes Salientes
124
Cambiar la Resolución Predeterminada
124
Cambio de la Configuración de Volumen
125
Cambiar la Configuración del Volumen
125
Cambio de las Bandejas de Entrada y Salida para Faxes Entrantes
125
Cambiar las Bandejas de Entrada y Salida
125
Configuración de la Detección del Tono de Marcado
126
Establecer la Detección del Tono de Marcado
126
Configuración de un Prefijo de Marcado
126
Configurar el Prefijo de Marcado
126
Configuración de las Reglas de Rellamada
127
Establecer las Reglas de Rellamada
127
Configuración del Marcado por Tonos O por Pulsos
127
Establecer el Marcado por Tonos O Pulsos
127
Bloqueo de Faxes Entrantes
128
Bloquear Faxes Entrantes
128
Habilitación de Los Códigos de Facturación
128
Activar Los Códigos de Facturación
128
Generación de Informes de Fax
129
Imprimir el Registro de Actividad de Fax
129
Imprimir un Informe de Llamadas de Fax
129
Imprimir un Informe con Primera Página
130
Imprimir un Informe de Lista de Faxes Bloqueados
130
Imprimir un Informe de Códigos de Facturación
130
Borrar la Información Almacenada
131
Borrar el Registro de Actividad
131
Cancelar O Eliminar Faxes
131
El Fax Está Configurado Correctamente
133
Qué Tipo de Línea Telefónica Utiliza
134
Utiliza un Divisor de Línea Telefónica
135
Utiliza un Dispositivo de Protección contra Sobretensiones
135
Utiliza un Servicio de Mensajería de Voz de la Compañía Telefónica O un Contestador Automático
135
3 Resolución de Problemas
133
Problemas Generales del Fax
136
Problemas al Recibir Faxes
137
Problemas al Enviar Faxes
139
Indicaciones LED
140
Appendix A Especificaciones E Información sobre Normativas
143
Especificaciones del Accesorio de Fax
143
Accesorios y Piezas de Recambio
145
US Federal Communications Commission (Comisión Federal de Comunicaciones de EE.UU.)
146
Declaración de Conformidad con la Parte 15 de la Normativa FCC
146
Declaración de Conformidad con la Parte 68 de la Normativa FCC
146
Ley de Protección al Usuario Telefónico (EE.UU.)
147
Departamento de Comunicaciones de Canadá
148
Requisitos IC Cs
148
Información sobre Otras Normativas
149
Información sobre Normativas para Los Países/Regiones de la Unión Europea
149
Declaración de Conformidad
150
Declaración de Garantía Limitada de Hewlett-Packard
151
Programa de Administración Medioambiental de Productos
152
Protección del Medio Ambiente
152
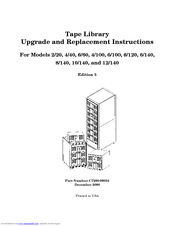
HP LaserJet 4100 Upgrade And Replacement Instructions (124 pages)
Tape Library Upgrade and Replacement Instructions
Brand:
HP
| Category:
Storage
| Size: 5.1 MB
Table of Contents
Table of Contents
5
1 Upgrading the Library
13
Upgrade Kit Components
14
Drive Upgrade Kits
14
Table 1-1 DLT Drive Upgrade Kit Components
14
Table 1-2 Ultrium Drive Upgrade Kit Components
14
Fibre Channel Upgrade Kits
15
Table 1-3 Standard Performance Fibre Channel Upgrade Kit (LVDS and HVDS)
15
Table 1-4 High Performance Fibre Channel Upgrade Kit (LVDS)
15
Redundant Power Supply Upgrade Kit
16
Table 1-5 Redundant Power Supply Upgrade Kit
16
Upgrading Drive Capacity
17
Upgrading Firmware
17
Installing a Drive Module
17
Figure 1-1 Installing a Drive Module
18
Figure 1-2 Example of SCSI Cable Connections (Model 2/20)
20
Configuring the New Drive
22
Adding Fibre Channel or Remote Management Cards
23
Figure 1-4 Library Card Positions
24
Upgrading to a Redundant Power Supply
26
Figure 1-5 Adding the Redundant Power Supply Module
27
2 Removing and Replacing Major Library Components
29
Overview
30
Exploded Views of Replaceable Parts (Frus)
32
Front and Back Frus
33
Figure 2-1 Exploded View of Front and Back Frus
33
Table 2-2 Description of Front and Back Frus
34
Cosmetic and Sheetmetal Frus
36
Figure 2-2 Cosmetic and Sheetmetal Exploded View (1 of 2)
36
Table 2-3 Description of Cosmetic and Sheetmetal Frus (1 of 2)
37
Figure 2-3 Exploded View of Cosmetic and Sheetmetal Frus (2 of 2)
38
Table 2-4 Description of Cosmetic and Sheetmetal Frus (2 of 2)
39
Internal Frus
40
Figure 2-4 Exploded View of Internal Frus (1 of 2)
40
Table 2-5 Description of Internal Frus (1 of 2)
41
Figure 2-5 Exploded View of Internal Frus (2 of 2)
42
Table 2-6 Description of Internal Frus (2 of 2)
43
Model 12/140 Frus
44
Table 2-7 Unique Parts for Model 12/140 (5 of 5)
45
Removing and Replacing Cards
46
Removing a Card
46
Replacing a Card
47
Removing and Replacing Drive Modules
49
Drive Replacement Overview
49
Determining Which Drive Has Failed
50
Unloading a Tape from a Drive
50
Taking a Drive Offline
50
Removing a Drive Module
51
Figure 2-8 Ribbon Cable and Connector
51
Figure 2-9 Removing a Drive
52
Installing a Drive Module
54
Figure 2-10 Installing a Drive Module
54
Removing and Replacing the Transport Assembly
56
Accessing the Transport Assembly
56
Figure 2-12 Access to the Transport Assembly
59
Removing the Transport Assembly
60
Replacing the Transport Assembly
61
Figure 2-14 Guide Blocks
61
Figure 2-15 Transport Assembly Position
62
Replacing the Cover
63
Removing and Replacing the Transport Assembly
64
Accessing the Side Panels for Service
64
Figure 2-16 Removing the Cabinet Side Panels
66
Figure 2-17 Removing the Library Side Panels
67
Accessing the Transport Assembly
68
Figure 2-18 Removing the Interconnect Cable
69
Figure 2-19 Removing the Shipping Brackets
70
Figure 2-20 Removing the Retainer Brackets
71
Removing the Transport Assembly
72
Replacing the Transport Assembly
73
Figure 2-22 Transport Assembly Position
73
Re-Installing the Bottom Module
74
Figure 2-23 Checking the Module Alignment
74
Reassembling the Library
75
Removing and Replacing the Vertical Lift Assembly for Models
76
Removing the Vertical Lift Assembly
76
And 12/140
76
Replacing the Vertical Lift Assembly
76
Figure 2-24 Vertical Lift Assembly
77
Removing and Replacing the Motherboard
78
Removing the Motherboard
78
Figure 2-25 Motherboard Cable Connections
79
Figure 2-26 Screw Locations on the Motherboard
80
Figure 2-27 Rotating the Sheet-Metal Cover
81
Figure 2-28 Removing Two Side Panels
83
Figure 2-29 Magazine Lock Harness Cable Connection
84
Figure 2-30 Removing the Motherboard
85
Replacing the Motherboard
86
Removing and Replacing the Power Supply
87
Removing the Power Supply
87
Replacing the Power Supply
88
Removing and Replacing the Redundant Power Supply
89
Replacing the Redundant Power Supply Module
89
Figure 2-32 Replacing the Redundant Power Supply Module
90
Replacing Individual Redundant Power Supply Units
91
Figure 2-33 Replacing Individual Power Supply Units
92
Removing and Replacing the Power Distribution Unit
93
Figure 2-34 Removing the Power Distribution Unit
94
Removing and Replacing the Front Panel Display
95
Removing the Front Panel Display
95
Figure 2-35 Removing the Chin Plate and
95
Replacing the Front Panel Display
96
Figure 2-36 Removing the Front Panel Display
96
Figure 2-37 Connecting the Front Panel
97
Removing and Replacing a Cosmetic Door
98
Removing a Cosmetic Door Face
98
Replacing a Cosmetic Door
98
Figure 2-38 Removing Front Door Face
99
3 Downloading Firware and Interpreting Leds
101
Upgrading Firmware
102
Checking the Firmware Revision
102
Using the Remote Management Card (Library Firmware Only)
103
Using a Firmware Upgrade Tape (Drive Firmware Only)
104
Using a CE Diagnostic Tool (for Service Personnel)
105
Library Leds
107
Front Panel Leds
107
Back Panel Leds
108
Table 3-3 Remote Management Card Leds
110
Table 3-8 High Performance Fibre Channel Controller Leds
115
Table 3-10 Picker Voltage Leds (See (1) in Figure below for LED Locations)
117
Table 3-11 Picker Controller Leds (See (2) for LED Locations)
117
Configuring the Library
119
Configuring the Remote Management Card
120
Install and Configure the Remote Management Card
120
Installation
120
Configuration
120
Configuring the Library for Fibre Channel
122
Configuration
122
HP LaserJet 4100 Support Manual (56 pages)
HP MFP Digital Sending Software v. 4 - Support Guide
Brand:
HP
| Category:
Software
| Size: 0.94 MB
Table of Contents
Table of Contents
5
1 The HP MFP Digital Sending Software
7
Features and Options
7
How to Configure
9
Architectural Overview
18
Legacy Support
19
HP Address Book Manager
19
Older MFP Models
19
Environments and Protocols
19
Network Operating Systems
19
Novell Netware Support
20
Types of Destinations
20
E-Mail
20
Fax
21
Authentication
21
Authentication Methods
22
Addressing Capabilities
22
Authentication and Address Book Availability
23
Personal Address Books
23
Local MFP Address Book Preservation
23
HP DSS V.
25
Licensing
25
2 Support Tools and Procedures
27
Support Tools
27
Using Windows Service to Start and Stop
27
Using the HP MFP DSS Configuration Utility
28
Using the Activity Log
28
Using the Windows Event Log
29
Using the HP Address Book Manager (ABM)
29
3 Troubleshooting
31
Introduction
31
Sources for Information about Problems
32
Common Digital Sending Problems
33
Windows Viewer Log Messages
37
Control Panel Messages
39
HP MFP DSS Configuration Utility Messages
42
Distributed Session Management Protocol (DSMP) Error Codes
43
4 Customer Support and Warranty Information
45
HP Customer Care Service and Support
45
Hewlett-Packard Limited Warranty Statement
46
HP Software License Terms
46
Part 2
48
Index
51
HP LaserJet 4100 Specification (50 pages)
Enterprise Virtual Array
Brand:
HP
| Category:
Storage
| Size: 1.47 MB
Table of Contents
What's New
3
Product Highlights
4
Fibre Channel
14
Easy Installation
14
Power Distribution
22
Service and Support, HP Care Pack, and Warranty Information
23
Field Installation
32
Controller Firmware
36
Step 8 - Expansion Options
39
Switch Option
41
Upgrade Installation
46
SAN Components
46
Technical Specifications
47
HP LaserJet 4100 User Manual (18 pages)
HP MFP Digital Sending Software v. 4 - User Guide
Brand:
HP
| Category:
Software
| Size: 0.96 MB
Table of Contents
Table of Contents
5
Introduction to Digital Sending
7
About this Guide
7
About Digital Sending
8
Control Panel Methods
9
Steps for Sending
10
Using the Digital Sending Software
10
More Information
11
Types of Documents Created
11
Authentication
12
Describe Original Settings
13
Scan Settings
14
Solving Digital Sending Problems
15
MFP Online Help System
15
Possible Problems
16
HP LaserJet 4100 User Manual (16 pages)
PRO WEBCAM
Brand:
HP
| Category:
Webcam
| Size: 1.49 MB
Table of Contents
Product Registration
2
Table of Contents
3
Webcam Overview
5
Software Overview
6
System Requirements
6
Using the Launch Utility to Start a Video Chat
7
Recording a Video
8
Taking a Picture
9
Managing Pictures and Videos
10
Posting a Video on Youtube
10
Applying Effects to a Video or Picture
11
Editing a Video
12
Adjusting Webcam Settings
13
Adjusting Additional Webcam Settings
14
Troubleshooting
15
Related Products
HP LaserJet 4200tn
HP LaserJet 4300tn
HP 4550hdn - Color LaserJet Laser Printer
HP 4050n - LaserJet B/W Laser Printer
HP Deskjet 400L
HP 460wf - Deskjet Color Inkjet Printer
HP LaserJet 4L
HP 4650 - Color LaserJet Laser Printer
HP LaserJet 4Si MX
HP 4000 Series, 4050 Series
HP Categories
Desktop
Laptop
Server
Monitor
Switch
More HP Manuals