beautypg.com
Manuals
Brands
Panasonic Manuals
Camcorder
AJ-PX5000G
Panasonic AJ-PX5000G Manuals
Manuals and User Guides for Panasonic AJ-PX5000G. We have
4
Panasonic AJ-PX5000G manuals available for free PDF download: Operating Instructions Manual, Review
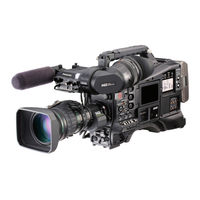
Panasonic AJ-PX5000G Operating Instructions Manual (260 pages)
Brand:
Panasonic
| Category:
Camcorder
| Size: 20.59 MB
Table of Contents
Operating Instructions
1
Read this First
2
Declaration of Conformity
3
Fcc Warning
3
Table of Contents
7
Chapter 1 Overview
9
Before Using the Camera
10
Setting the Region of Use (Setting Frame Frequency, Etc.)
11
Accessories
12
Use of the Camera on a System
13
Basic Configuration Devices
13
Expanded Configuration Devices
13
Accessories
13
Chapter 2 Description of Parts
14
Power Supply and Accessory Mounting Section
15
Power Supply and Accessory Mounting Section
16
Audio (Input) Function Section
17
Audio (Input) Function Section
18
Audio (Output) Function Section
19
Shooting and Recording/Playback Functions Section
20
Shooting and Recording/Playback Functions Section
21
Shooting and Recording/Playback Functions Section
22
Menu Operation Section and Thumbnail Operation Section
24
Time Code Section
25
Warning and Status Display Section
26
Description on Display Window
27
Information Display
27
Chapter 3 Recording and Playback
29
Setting the Date/Time of the Internal Clock
30
P2 Card
31
Inserting a P2 Card
31
Removing a P2 Card
31
Preventing Accidental Erasure
32
P2 Card Access Leds and Status of P2 Cards
32
P2 Card Recording Time
33
CPS (Content Protection System)
34
How to Handle Data Recorded on P2 Cards
34
Basic Procedures
35
For Shooting
36
Basic Procedures
36
Standard Recording
37
Native Recording
37
Basic Procedures
37
Special Recording Functions
38
Pre-Recording
38
Interval Recording
38
One-Shot Recording
39
Loop Recording
39
Special Recording Functions
39
One-Clip Recording
40
Standard Recording
40
Simultaneous Recording
41
Standard Recording
41
Hot Swap Recording
42
Recording Check Function
42
Shot Mark Recording Function
42
Inserting a P2 Card
42
Text Memo Recording Function
43
Dual Codec Recording
44
Setting the Dual Codec
44
Setting Menu
44
Recording the Proxy Data
45
Recording to the SD Memory Card
45
Checking the Proxy Data
46
Dual Codec Recording
46
Error Displays about Proxy Data Recordings
47
Dual Codec Recording
47
Dual Codec Recording
48
Streaming Function
49
Setting the Network Connection
49
Using the Streaming Function
49
List of System Modes and Supported Streaming Output
49
Simultaneous Recording
49
List of Streaming Modes and Resolution/Frame Rates
50
Streaming Function
50
Normal and Variable Speed Playback
51
Chapter 4 Adjustments and Settings for Recording
52
Multi Formats
53
Selecting Recording Signals
53
System Modes and Recording Functions
53
Multi Formats
54
Multi Formats
55
List of Recording Settings and Recording Functions
56
Multi Formats
56
Selecting Video Output
57
Multi Formats
57
List of Recording/Playback and Output Formats
58
Multi Formats
59
Adjusting the White and Black Balance
60
Adjusting the White Balance
60
Adjusting the White and Black Balance
61
Adjusting the Black Balance
62
Adjusting the White and Black Balance
62
Setting the Electronic Shutter
64
Shutter Mode
64
Setting the Shutter Mode and Speed
64
Setting the Synchro Scan Mode
65
Flash Band Compensation (FBC) Function
66
Setting the Flash Band Compensation Function
66
Assigning Functions to
Buttons
67
Selecting Audio Input and Adjusting Recording Levels
69
Selecting Audio Input Signals
69
Adjusting the Recording Levels
69
Selection of External Reference Signal and Generator Lock Setting
72
Locking the Video Signal to the External Reference Signal
72
Setting the Time Data
73
Recording and Output of Time Codes and User Bits
73
Time Code
73
User Bits Settings
74
How to Input User Bits
75
Setting the Time Code
76
Externally Locking the Time Code
77
Setting the Camera ID
80
CTL Counter Setting and Display
81
Viewfinder Status Display
82
Lamp Display in the Viewfinder
82
Configuration of Status Display on Viewfinder Screen
82
Selecting Display Items on Viewfinder Screen
83
Screen Display
83
Checking and Displaying Shooting Status
89
Mode Check Display
91
Display Modes and Setting Changes/Adjustment Result Messages
92
Setting the Marker Display
93
Display of Marker Confirmation Screen (Marker Select Function)
93
Confirmation of Return Video Signal in the Viewfinder
93
Zebra Patterns Display
93
Focus Assist Function
94
Waveform Monitor Function
95
Adjusting and Setting the LCD Monitor
96
Adjusting and Setting the Viewfinder
97
Available Viewfinders
97
Handling Setting Data
99
Setting Data File Configuration
99
Handling SD Memory Cards
99
Performing Operations on SD Memory Cards
100
How to Use User Data
102
How to Use Scene File Data
102
How to Restore Menu Setting Status to Factory Setting Values
103
Lens File
103
Writing and Reading Lens Files to and from SD Memory Card
105
Chapter 5 Preparation
107
Power Supply
108
Mounting and Setting Battery
108
Using External DC Power Supply
109
Mounting and Adjusting the Lens
111
Mounting the Lens
111
Flange Back Adjustment
111
White Shading Compensation
112
Chromatic Aberration Compensation Function (CAC)
113
Preparing for Audio Input
116
Using the Front Microphone
116
Using a Wireless Microphone Receiver
116
Using Audio Devices
117
Mounting Accessories
118
Mounting the Camera on a Tripod
118
Attaching the Shoulder Strap
118
Attaching the Rain Cover
119
Connecting the
Terminal with the External Recording Start/Stop Switch
120
Chapter 6 Thumbnail Operations for Clips
121
Thumbnail Operations
122
Thumbnail Operation Overview
122
Thumbnail Screen
122
Selecting Thumbnails
125
Thumbnail Screen Display Settings
126
Playing Back Clips
127
Changing Thumbnails
127
Shot Mark
128
Text Memo
128
Deleting Clips
130
Restoring Clips
130
Reconnecting Incomplete Clips
130
Copying Clips
130
Setting Clip Metadata
131
Formatting a P2 Card
133
Formatting SD Memory Cards
133
Properties
134
Connecting to External Devices Using the
Terminal (Host) (USB Storage Mode)
138
Sd Memory Card Status Display
138
Chapter 7 Menu Operations
145
Setting Menu Structure
146
Menu Types and How to Open Them
146
Main Menu Structure
146
[OPTION MENU] Structure
146
Setting Menu Display
147
Setting Menu Basic Operations
147
Setting [USER MENU]
148
Menu List
149
[Paint]
149
Rb Gain Control
149
Rgb Black Control
149
Color Correction
151
Low Setting
152
MID Setting
153
High Setting
154
Additional Dtl
154
Skin Tone Dtl
155
S] Camera Setting
158
Vf Display
158
Vf Marker
159
Vf User Box
160
Vf Indicator
160
[Camera]
164
Shutter Speed
164
Shutter Select
164
User Sw
165
Sw Mode
166
White Balance Mode
167
[Clip]
168
User Sw Gain
168
Thumbnail Setup
170
Storage Copy Setup
171
[Rec/Pb]
172
Rec Function
172
Rec/Pb Setup
173
Rec Meta Data
175
[I/F Setup]
176
Sdi Out1 Marker
177
Downcon Setting
178
Lcd Monitor
184
[File]
186
Setup Data (Sd Card)
186
Setup Data Select
187
Sd Card Property
187
[Maintenance]
188
Lens File Adj
189
[System]
190
[User Menu Sel]
191
[Option Menu]
191
System Setup
191
Setting Items to [USER MENU] and Loading/Reading the Settings to a Data File
192
Chapter 8 Connecting to External Devices
208
Linking to External Devices
209
Connecting the External Device to the
Terminal (Device)
209
Connecting the External Device to the
Terminal (Host)
209
Connecting the Video and Monitor
209
Recording Images of External Devices
209
Connection Function Via
or
Terminals
210
Connecting to a Computer in the USB Device Mode
210
USB Storage Mode
211
External Device Connection and Recording Control Function Using HD SDI
212
HD SDI Remote Function
212
Connecting to the Remote Control Unit (AJ-RC10G)
213
Switch Functionality in Remote Control Mode
213
Recording and Playback Operations in Remote Control Mode
213
Remote Control Unit Connected to the Camera
213
Connecting to the Extension Control Unit (AG-EC4G)
215
Switch Functionality in Remote Control Mode
215
Recording and Playback Operations in Remote Control Mode
215
Connecting to Remote Operation Panel (AK-HRP200G)
216
Switch Functionality in Remote Control Mode
216
Recording and Playback Operations in Remote Control Mode
216
Remote Control Unit Connected to the Camera
217
Connecting to P2 ROP Application
218
Switch Functionality in Remote Control Mode
218
Recording and Playback Operations in Remote Control Mode
218
Chapter 9 Network Connection
219
Network Connection
220
Available Functions
220
Operating Environment
220
Preparing for Connection
221
For Wireless Module AJ-WM30
221
For Wired LAN
222
For Wireless Module Other than AJ-WM30
222
Network Settings
223
Wireless LAN Settings
223
Wired LAN Settings
225
Network Function
227
P2 Browser Function Settings and Connection Status Check
227
P2 Playlist Edit Function Setting
227
Setting for Connection with P2 ROP Application
228
Setting for IP Connection with the Remote Operation Panel (AK-HRP200G)
229
Connection Settings for the Streaming Function
229
Using FTP Client Function
231
FTP Client Function Setting
231
FTP Server Folder List (FTP Explorer Screen)
232
Deleting Clips on the FTP Server
233
Viewing Information of Clips on FTP Server
234
Transferring from a P2 Card to an FTP Server (Copy)
234
Writing Back from an FTP Server to a P2 Card (Copy)
234
Transferring from an SD Memory Card to an FTP Server (Export)
235
Writing Back from an FTP Server to an SD Memory Card (Import)
235
Rec During Upload Function
237
Transferring Recorded Clips Automatically (Automatic Transfer Mode)
237
Transferring Selected Clips Automatically (Manual Selection Mode)
237
Displaying the Upload List
238
Chapter 10 Maintenance and Inspection
240
Inspections before Shooting
241
Preparing to Inspect
241
Inspecting the Camera Unit
241
Inspecting the Memory Recording Functions
241
Maintenance
244
Charging the Built-In Battery
244
Warning System
245
Warnings Description List
245
Error Code
247
Warning Information Display
247
Warning/Error Displays in the Thumbnail Operation, Menu Operation, and USB Storage Mode
248
Updating the Camera Firmware
250
Chapter 11 Specification
251
Dimensions
252
Specifications
252
Digital Audio
253
Dimensions and Specifications
252
Details of the Connector Signals
255
Index
258
Panasonic AJ-PX5000G Operating Instructions Manual (235 pages)
Brand:
Panasonic
| Category:
Camcorder
| Size: 19.27 MB
Table of Contents
Operating Instructions
1
Read this First
2
Declaration of Conformity
3
Fcc Warning
3
Table of Contents
7
Chapter 1 Overview
9
Before Using the Camera
10
Setting the Region of Use (Setting Frame Frequency, Etc.)
11
Accessories
12
Use of the Camera on a System
13
Basic Configuration Devices
13
Expanded Configuration Devices
13
Accessories
13
Chapter 2 Description of Parts
14
Power Supply and Accessory Mounting Section
15
Audio (Input) Function Section
17
Audio (Output) Function Section
19
Shooting and Recording/Playback Functions Section
20
Shooting and Recording/Playback Functions Section
21
Shooting and Recording/Playback Functions Section
22
Menu Operation Section and Thumbnail Operation Section
24
Time Code Section
25
Warning and Status Display Section
26
Description on Display Window
27
Chapter 3 Recording and Playback
29
Setting the Date/Time of the Internal Clock
30
P2 Card
31
Inserting a P2 Card
31
Removing a P2 Card
31
P2 Card Access Leds and Status of P2 Cards
32
P2 Card Recording Time
33
CPS (Content Protection System)
34
How to Handle Data Recorded on P2 Cards
34
Preventing Accidental Erasure
32
Basic Procedures
35
Inserting a P2 Card
35
For Shooting
36
Inserting a P2 Card
37
Standard Recording
37
Special Recording Functions
38
Pre-Recording
38
Interval Recording
38
One-Shot Recording
39
Loop Recording
39
Special Recording Functions
39
One-Clip Recording
40
Simultaneous Recording
41
Hot Swap Recording
42
Recording Check Function
42
Shot Mark Recording Function
42
Text Memo Recording Function
43
Special Recording Functions
43
Dual Codec Recording
44
Setting the Dual Codec
44
Recording the Proxy Data
45
Recording to the SD Memory Card
45
Checking the Proxy Data
46
Error Displays about Proxy Data Recordings
47
Normal and Variable Speed Playback
48
Chapter 4 Adjustments and Settings for Recording
49
Multi Formats
50
Selecting Recording Signals
50
System Modes and Recording Functions
50
List of Recording Settings and Recording Functions
51
Multi Formats
51
Selecting Video Output
52
Multi Formats
52
List of Recording/Playback and Output Formats
53
Multi Formats
53
Adjusting the White and Black Balance
54
Adjusting the White Balance
54
Adjusting the White and Black Balance
55
Adjusting the Black Balance
56
Adjusting the White and Black Balance
57
Setting the Electronic Shutter
58
Shutter Mode
58
Setting the Shutter Mode and Speed
58
Setting the Synchro Scan Mode
59
Flash Band Compensation (FBC) Function
60
Setting the Flash Band Compensation Function
60
Assigning Functions to
Buttons
61
Selecting Audio Input and Adjusting Recording Levels
63
Selecting Audio Input Signals
63
Adjusting the Recording Levels
63
Selecting Audio Input and Adjusting Recording Levels
64
Selection of External Reference Signal and Generator Lock Setting
66
Locking the Video Signal to the External Reference Signal
66
Setting the Time Data
67
Recording and Output of Time Codes and User Bits
67
User Bits Settings
68
How to Input User Bits
68
Setting the Time Code
69
Externally Locking the Time Code
70
Setting the Camera ID
73
CTL Counter Setting and Display
73
Viewfinder Status Display
75
Lamp Display in the Viewfinder
75
Configuration of Status Display on Viewfinder Screen
75
Selecting Display Items on Viewfinder Screen
76
Screen Display
76
Checking and Displaying Shooting Status
81
Mode Check Display
83
Display Modes and Setting Changes/Adjustment Result Messages
84
Setting the Marker Display
85
Display of Marker Confirmation Screen (Marker Select Function)
85
Confirmation of Return Video Signal in the Viewfinder
85
Zebra Patterns Display
86
Focus Assist Function
86
Waveform Monitor Function
87
Adjusting and Setting the LCD Monitor
88
Adjusting and Setting the Viewfinder
89
Available Viewfinders
89
Handling Setting Data
91
Setting Data File Configuration
91
Handling SD Memory Cards
91
Performing Operations on SD Memory Cards
92
How to Use User Data
94
How to Use Scene File Data
94
How to Restore Menu Setting Status to Factory Setting Values
95
Lens File
95
Writing and Reading Lens Files to and from SD Memory Card
97
Chapter 5 Preparation
99
Power Supply
100
Mounting and Setting Battery
100
Using External DC Power Supply
101
Mounting and Adjusting the Lens
103
Mounting the Lens
103
Flange Back Adjustment
103
White Shading Compensation
104
Chromatic Aberration Compensation Function (CAC)
105
Preparing for Audio Input
108
Using the Front Microphone
108
Using a Wireless Microphone Receiver
108
Using Audio Devices
109
Mounting Accessories
110
Mounting the Camera on a Tripod
110
Attaching the Shoulder Strap
110
Attaching the Rain Cover
111
Connecting the
Terminal with the External Recording Start/Stop Switch
112
Chapter 6 Thumbnail Operations for Clips
113
Thumbnail Operations
114
Thumbnail Operation Overview
114
Thumbnail Screen
114
Selecting Thumbnails
116
Selecting Clips
116
Thumbnail Screen Display Settings
117
Playing Back Clips
118
Changing Thumbnails
118
Shot Mark
119
Text Memo
119
Deleting Clips
121
Restoring Clips
121
Reconnecting Incomplete Clips
121
Copying Clips
121
Setting Clip Metadata
122
Formatting a P2 Card
124
Formatting SD Memory Cards
124
Properties
125
Host) (USB Storage Mode)
129
Chapter 7 Menu Operations
136
Setting Menu Structure
137
Menu Types and How to Open Them
137
Main Menu Structure
137
[OPTION MENU] Structure
139
Setting Menu Display
140
Setting Menu Basic Operations
140
Setting [USER MENU]
141
Menu List
142
[Paint]
142
Rb Gain Control
142
Rgb Black Control
142
Low Setting
144
MID Setting
145
High Setting
146
Additional Dtl
146
[Camera]
154
White Balance Mode
157
[Clip]
158
Thumbnail Setup
160
[Rec/Pb]
161
[I/F Setup]
165
Sdi Out1 Marker
166
Downcon Setting
167
Lcd Monitor
171
[File]
174
[Maintenance]
175
Lens Adj
176
Black Shading
176
White Shading
176
Lens File Adj
176
[System]
177
System Setup
178
Hours Meter
178
[User Menu Sel]
179
[Option Menu]
179
Setting Items to [USER MENU] and Loading/Reading the Settings to a Data File
179
Chapter 8 Connecting to External Devices
194
Linking to External Devices
195
Connecting the External Device to the
Terminal (Device)
195
Connecting the External Device to the
Terminal (Host)
195
Connecting the Video and Monitor
195
Recording Images of External Devices
195
Connection Function Via
or
Terminals
196
Connecting to a Computer in the USB Device Mode
196
USB Storage Mode
197
External Device Connection and Recording Control Function Using HD SDI
198
HD SDI Remote Function
198
Connecting to the Remote Control Unit (AJ-RC10G)
199
Switch Functionality in Remote Control Mode
199
Recording and Playback Operations in Remote Control Mode
199
Remote Control Unit Connected to the Camera
199
Connecting to the Extension Control Unit (AG-EC4G)
201
Switch Functionality in Remote Control Mode
201
Recording and Playback Operations in Remote Control Mode
201
Chapter 9 Network Connection
202
Network Connection
203
Available Functions
203
Operating Environment
203
Preparing for Connection
204
For Wireless LAN
204
For Wired LAN
205
Network Settings
206
Wireless LAN Settings
206
Wired LAN Settings
207
P2 Browser Function Settings and Connection Status Check
209
FTP Client Function Setting
209
Using FTP Client Function
211
FTP Server Folder List (FTP Explorer Screen)
211
Deleting Clips on the FTP Server
212
Viewing Information of Clips on FTP Server
212
Transferring from a P2 Card to an FTP Server (Copy)
213
Writing Back from an FTP Server to a P2 Card (Copy)
213
Transferring from an SD Memory Card to an FTP Server (Export)
214
Writing Back from an FTP Server to an SD Memory Card (Import)
214
Chapter 10 Maintenance and Inspection
215
Inspections before Shooting
216
Preparing to Inspect
216
Inspecting the Camera Unit
216
Inspecting the Memory Recording Functions
216
Maintenance
219
Charging the Built-In Battery
219
Warning System
220
Warnings Description List
220
Error Code
222
Warning Information Display
222
Warning/Error Displays in the Thumbnail Operation, Menu Operation, and USB Storage Mode
223
Updating the Camera Firmware
225
Chapter 11 Specification
226
Dimensions
227
Specifications
227
Digital Audio
228
Dimensions and Specifications
227
Details of the Connector Signals
230
Index
233
Panasonic AJ-PX5000G Operating Instructions Manual (209 pages)
Memory card camera-recorder
Brand:
Panasonic
| Category:
Camcorder
| Size: 18.33 MB
Table of Contents
Operating Instructions
1
Read this First
2
Declaration of Conformity
3
Fcc Warning
3
Table of Contents
7
Chapter 1 Overview
9
Before Using the Camera
10
Setting the Region of Use (Setting Frame Frequency, Etc.)
11
Accessories
12
Use of the Camera on a System
13
Basic Configuration Devices
13
Expanded Configuration Devices
13
Accessories
13
Chapter 2 Description of Parts
14
Power Supply and Accessory Mounting Section
15
Audio (Input) Function Section
17
Audio (Output) Function Section
19
Shooting and Recording/Playback Functions Section
20
Menu Operation Section and Thumbnail Operation Section
24
Time Code Section
25
Warning and Status Display Section
26
Description on Display Window
27
Information Display
27
Chapter 3 Recording and Playback
29
Setting the Date/Time of the Internal Clock
30
P2 Card
31
Inserting a P2 Card
31
Removing a P2 Card
31
Preventing Accidental Erasure
32
P2 Card Access Leds and Status of P2 Cards
32
P2 Card Recording Time
33
CPS (Content Protection System)
33
How to Handle Data Recorded on P2 Cards
34
Basic Procedures
35
For Shooting
36
Standard Recording
37
Special Recording Functions
38
Pre-Recording
38
Loop Recording
38
Hot Swap Recording
39
Recording Check Function
39
Shot Mark Recording Function
39
Text Memo Recording Function
40
Proxy Recording
41
Proxy Settings
41
Recording the Proxy Data
42
Recording to the SD Memory Card
42
Checking the Proxy Data
42
Error Displays about Proxy Data Recordings
43
Normal and Variable Speed Playback
45
Chapter 4 Adjustments and Settings for Recording
46
Multi Formats
47
Selecting Recording Signals
47
System Modes and Recording Functions
47
List of Recording Settings and Recording Functions
47
Selecting Video Output
48
List of Recording/Playback and Output Formats
48
Adjusting the White and Black Balance
49
Adjusting the White Balance
49
White Balance Memory
50
Adjusting the Black Balance
51
Setting the Electronic Shutter
53
Shutter Mode
53
Setting the Shutter Mode and Speed
53
Setting the Synchro Scan Mode
54
Flash Band Compensation (FBC) Function
55
Setting the Flash Band Compensation Function
55
Assigning Functions to
Buttons
56
Selecting Audio Input and Adjusting Recording Levels
58
Selecting Audio Input Signals
58
Adjusting the Recording Levels
58
Selection of External Reference Signal and Generator Lock Setting
61
Locking the Video Signal to the External Reference Signal
61
Setting the Time Data
62
Recording and Output of Time Codes and User Bits
62
Time Code
62
User Bits Settings
63
How to Input User Bits
63
Setting the Time Code
64
Externally Locking the Time Code
65
Setting the Camera ID
67
CTL Counter Setting and Display
68
Viewfinder Status Display
70
Lamp Display in the Viewfinder
70
Configuration of Status Display on Viewfinder Screen
70
Selecting Display Items on Viewfinder Screen
71
Screen Display
71
Checking and Displaying Shooting Status
76
Mode Check Display
77
Display Modes and Setting Changes/Adjustment Result Messages
79
Setting the Marker Display
79
Display of Marker Confirmation Screen (Marker Select Function)
80
Confirmation of Return Video Signal in the Viewfinder
80
Zebra Patterns Display
80
Focus Assist Function
80
Waveform Monitor Function
81
Adjusting and Setting the LCD Monitor
82
Locking the Video Signal to the External Reference Signal
82
Adjusting and Setting the Viewfinder
83
Available Viewfinders
83
Handling Setting Data
85
Setting Data File Configuration
85
Handling SD Memory Cards
85
Performing Operations on SD Memory Cards
86
How to Use User Data
88
How to Use Scene File Data
88
How to Restore Menu Setting Status to Factory Setting Values
89
Lens File
89
Writing and Reading Lens Files to and from SD Memory Card
91
Chapter 5 Preparation
93
Power Supply
94
Mounting and Setting Battery
94
Using External DC Power Supply
95
Mounting and Adjusting the Lens
97
Mounting the Lens
97
Flange Back Adjustment
97
White Shading Compensation
98
Chromatic Aberration Compensation Function (CAC)
99
Preparing for Audio Input
102
Using the Front Microphone
102
Using a Wireless Microphone Receiver
102
Using Audio Devices
103
Mounting Accessories
104
Mounting the Camera on a Tripod
104
Attaching the Shoulder Strap
104
Attaching the Rain Cover
105
Connecting the
Terminal with the External Recording Start/Stop Switch
106
Chapter 6 Thumbnail Operations for Clips
107
Thumbnail Operations
108
Thumbnail Operation Overview
108
Thumbnail Screen
108
Selecting Thumbnails
110
Thumbnail Screen Display Settings
111
Playing Back Clips
112
Changing Thumbnails
112
Shot Mark
113
Text Memo
113
Deleting Clips
115
Restoring Clips
115
Reconnecting Incomplete Clips
115
Copying Clips
115
Setting Clip Metadata
116
Formatting a P2 Card
118
Formatting SD Memory Cards
118
Properties
119
Connecting to External Devices Using the
Terminal (Host) (USB Storage Mode)
123
Sd Memory Card Status Display
123
Chapter 7 Menu Operations
130
Setting Menu Structure
131
Menu Types and How to Open Them
131
Main Menu Structure
131
[OPTION MENU] Structure
133
Setting Menu Display
134
Setting Menu Basic Operations
134
Setting [USER MENU]
135
Menu List
136
[Paint]
136
Rb Gain Control
136
Rgb Black Control
136
Low Setting
138
MID Setting
139
High Setting
139
Additional Dtl
140
Skin Tone Dtl
140
S] Camera Setting
142
Vf Display
143
Vf Marker
144
Vf User Box
144
Vf Indicator
145
[Camera]
147
Shutter Speed
147
Shutter Select
148
User Sw
148
Sw Mode
149
White Balance Mode
150
User Sw Gain
151
[Clip]
152
Thumbnail Setup
153
[Rec/Pb]
154
Storage Copy Setup
154
Rec Function
154
Rec/Pb Setup
155
Proxy Setup
156
[I/F Setup]
157
Rec Metadata
157
Sdi Out1 Marker
158
Downcon Setting
159
Lcd Monitor
162
[File]
164
Lens File
165
Setup Data (Sd Card)
165
Setup Data Select
165
[Maintenance]
166
Sd Card Property
166
System Check
166
Black Shading
167
White Shading
167
Lens File Adj
167
[System]
168
[User Menu Sel]
169
[Option Menu]
169
Setting Items to [USER MENU] and Loading/Reading the Settings to a Data File
170
Chapter 8 Connecting to External Devices
183
Linking to External Devices
184
Connecting the External Device to the
Terminal (Device)
184
Connecting the External Device to the
Terminal (Host)
184
Connecting the Video and Monitor
184
Recording Images of External Devices
184
Connection Function Via
or
Terminals
185
Connecting to a Computer in the USB Device Mode
185
USB Storage Mode
186
Connecting to the Remote Control Unit (AJ-RC10G)
187
Connecting to the Extension Control Unit (AG-EC4G)
188
Chapter 9 Maintenance and Inspection
189
Inspections before Shooting
190
Preparing to Inspect
190
Inspecting the Camera Unit
190
Inspecting the Memory Recording Functions
190
Maintenance
193
Charging the Built-In Battery
193
Warning System
194
Warnings Description List
194
Error Code
196
Warning Information Display
196
Warning/Error Displays in the Thumbnail Operation, Menu Operation, and USB Storage Mode
197
Updating the Camera Firmware
199
Chapter 10 Specification
200
Dimensions and Specifications
201
Dimensions
201
Specifications
201
Digital Audio
202
Details of the Connector Signals
204
Index
207
Panasonic AJ-PX5000G Review (12 pages)
Memory Card Camera Recorder
Brand:
Panasonic
| Category:
Camcorder
| Size: 2.78 MB
Table of Contents
Network Solutions
3
Other Interfaces
7
System Workflow
8
System Chart
8
Optional Accessories
10
Specifications
11
Related Products
Panasonic AJ-PX270
panasonic AJ-PX800G
Panasonic AJ-PX270EJ
Panasonic AJ-PX380G
Panasonic AJ-PX230 Series
Panasonic AJ-PX5100G
Panasonic AJ-PX230E
Panasonic AJ-PD900
Panasonic AJ-PD900WP
Panasonic AJ-P2C004HG
Panasonic Categories
Air Conditioner
Camcorder
TV
Digital Camera
Cordless Telephone
More Panasonic Manuals