S&T Kontron CP3005-SA Manuals
Manuals and User Guides for S&T Kontron CP3005-SA. We have 1 S&T Kontron CP3005-SA manual available for free PDF download: User Manual
S&T Kontron CP3005-SA User Manual (115 pages)
Brand: S&T
|
Category: Computer Hardware
|
Size: 10.16 MB
Table of Contents
-
Symbols7
-
-
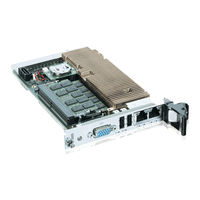
Front Panel20
-
Board Layout21
-
Standards25
-
-
Processor27
-
Chipset28
-
Battery29
-
Flash Memory29
-
Flash Module29
-
Serial Ports40
-
-
-
-
Regulation55
-
-
Airflow59
-
-
Overview62
-
-
-
Overview69
-
-
-
Overview74
-
Front Panels75
-
-
-
Overview81
-
-
-
Safety83
-
-
-
Setup Menus96
-
Chipset Menu100
-
Boot Setup Menu105
-
The Uefi Shell107